Install & guides
Install and use Nucleus on Mac, iPhone, iPad, Android, and Apple Watch
Download for each platform, connect Nucleus Cloud, sync between devices, manage bills and notes, and get notifications — with step-by-step instructions and screenshots from the app.
How Nucleus works across devices
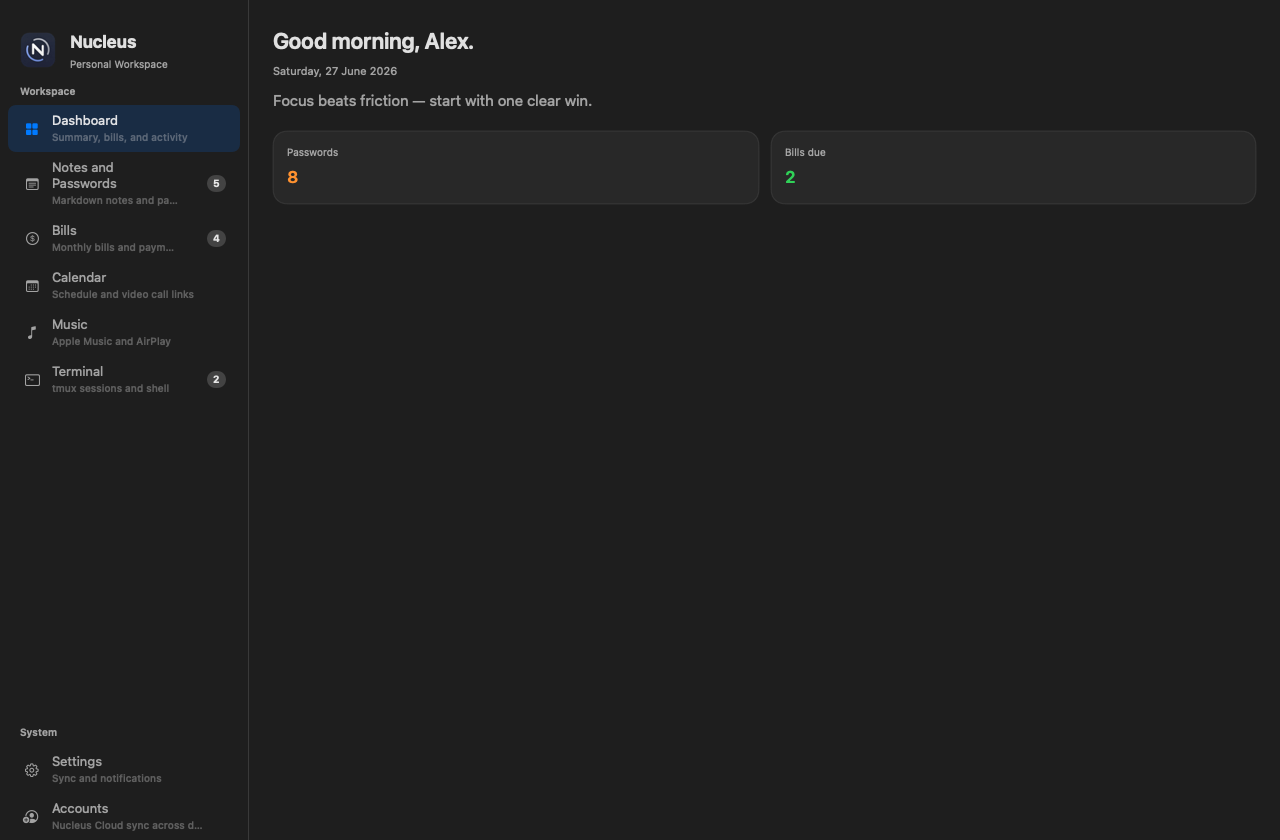
Nucleus on macOS is your full personal workspace. The iPhone, iPad, and Android companions focus on dashboard, notes, passwords, bills, and calendar — synced through Nucleus Cloud using the same email you sign in with on your Mac.
Step 1
macOS is the hub
Create and edit notes, track bills, manage calendar events, and run your daily workflow on your Mac. Changes save locally and back up to Nucleus Cloud automatically.
Step 2
Mobile is the companion
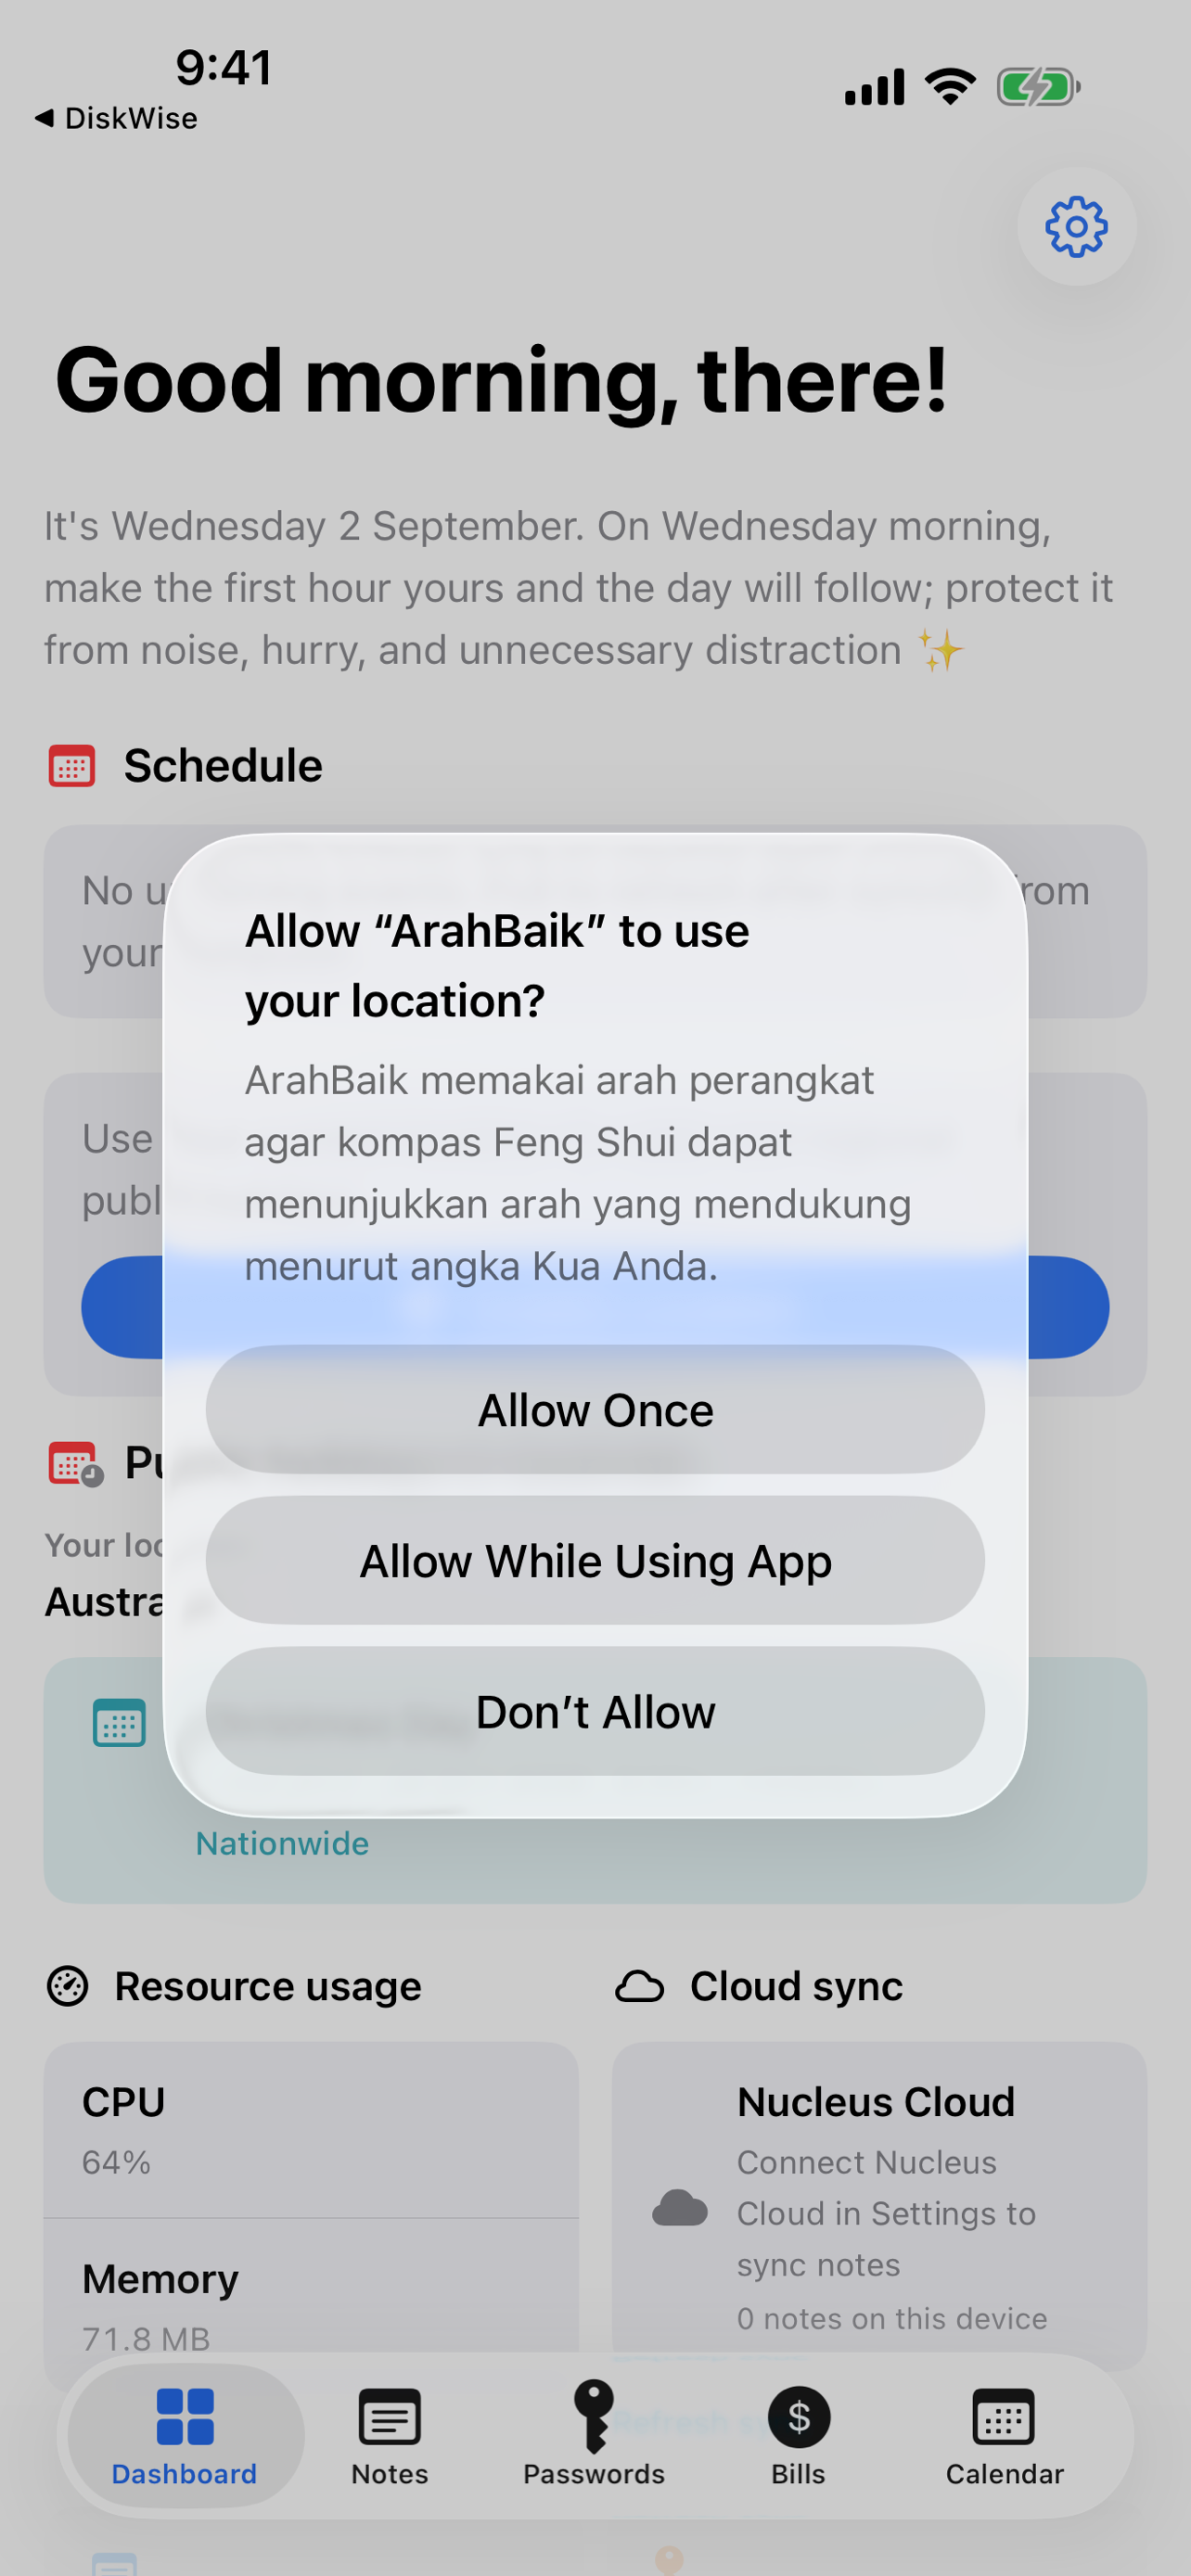
The iOS, iPadOS, and Android apps give you read/write access to notes, passwords, and bills on the go. Pull to refresh or tap Sync from Nucleus Cloud in Settings.
Step 3
Android sideload
Download the debug APK from the website and install manually. Sign in to Nucleus Cloud with the same Google account as your Mac.

Step 4
One account, same data
Sign in to Nucleus Cloud on Mac and mobile with the same Google account. Your Mac pushes notes, bills, and settings; mobile devices pull them down.
Step 5
Apple Watch companion
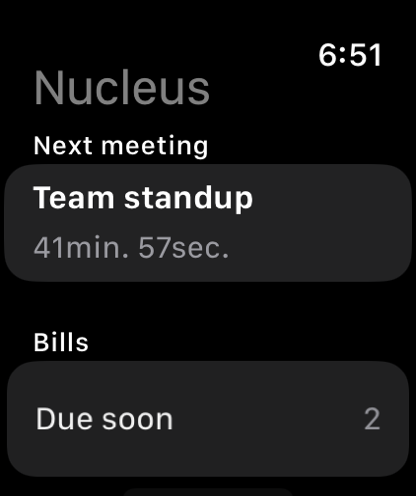
Install the watch app from the App Store on your paired Apple Watch. It shows bills due, your next meeting, notes count, and Nucleus Cloud sync status — updated from your iPhone.
Good to know
- Mail, Chat, and Terminal are macOS-only workspaces.
- Calendar events on mobile come from events synced via Nucleus Cloud or iCloud from your Mac.
Install on macOS
Download the DMG, install Nucleus in Applications, and connect Nucleus Cloud. Requires macOS 14 or later — Sparkle handles updates after the first install.
Step 1
Download for Mac
Get the latest DMG from the buttons above, or pick a specific version from the release history page.
Step 2
Open the DMG
Double-click the downloaded disk image to mount it.
Step 3
Install
Drag Nucleus.app into your Applications folder.
Step 4
Launch Nucleus
Open Nucleus from Applications or Spotlight.
Step 5
Explore the workspace
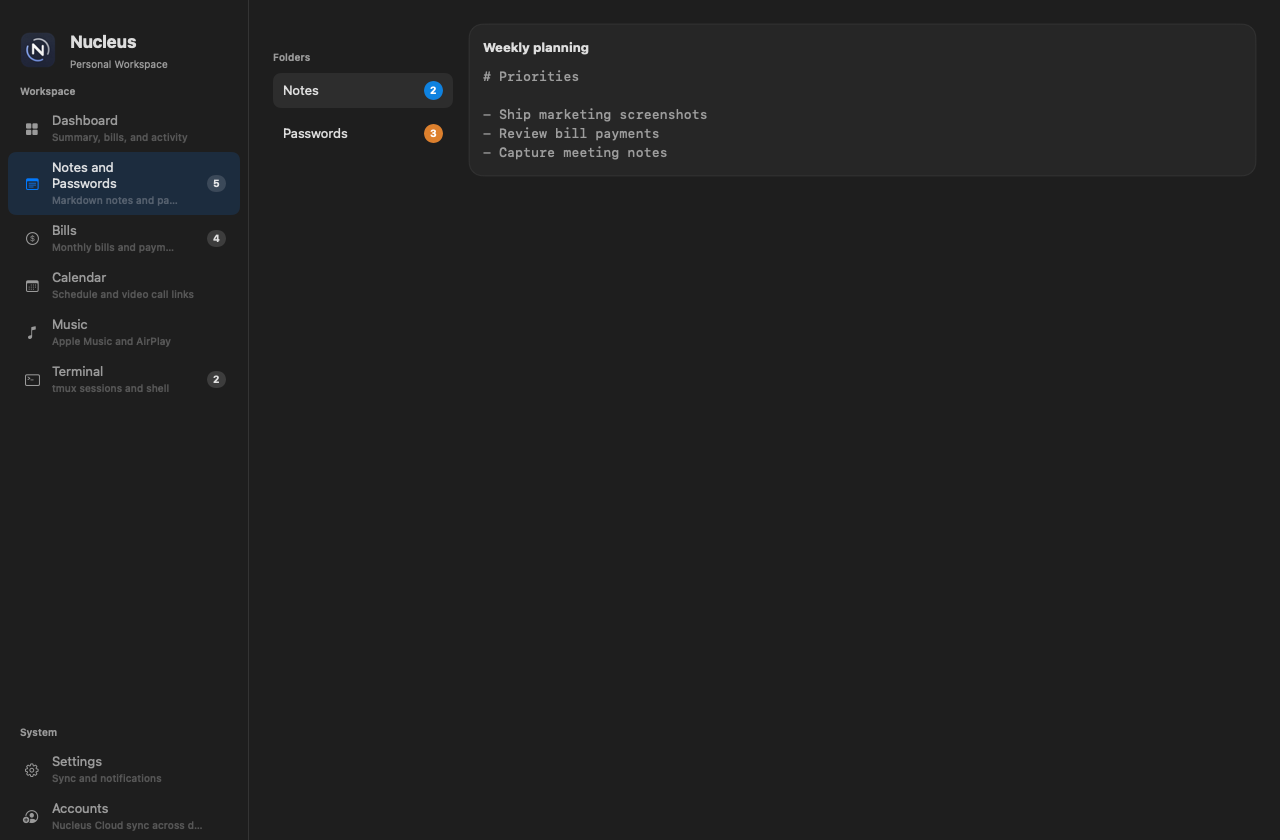
Use the sidebar to switch between Dashboard, Notes and Passwords, Bills, Calendar, and Terminal. Accounts and Settings are under System at the bottom.
Step 6
Create your first note or bill
Add a note in the Notes workspace or create a bill in Bills. Nucleus saves locally immediately. Once Nucleus Cloud is connected, saves also sync to the cloud within a few seconds.
Step 7
Keep Nucleus updated
Nucleus checks for updates automatically via Sparkle. You can also browse release notes and download specific versions from the Versions page.
Step-by-step: Connect Nucleus Cloud
Nucleus Cloud backs up your workspace to a private account tied to your Google sign-in. This is the primary path for syncing macOS data to iPhone, iPad, and Android.
Step 1
Open Account Center
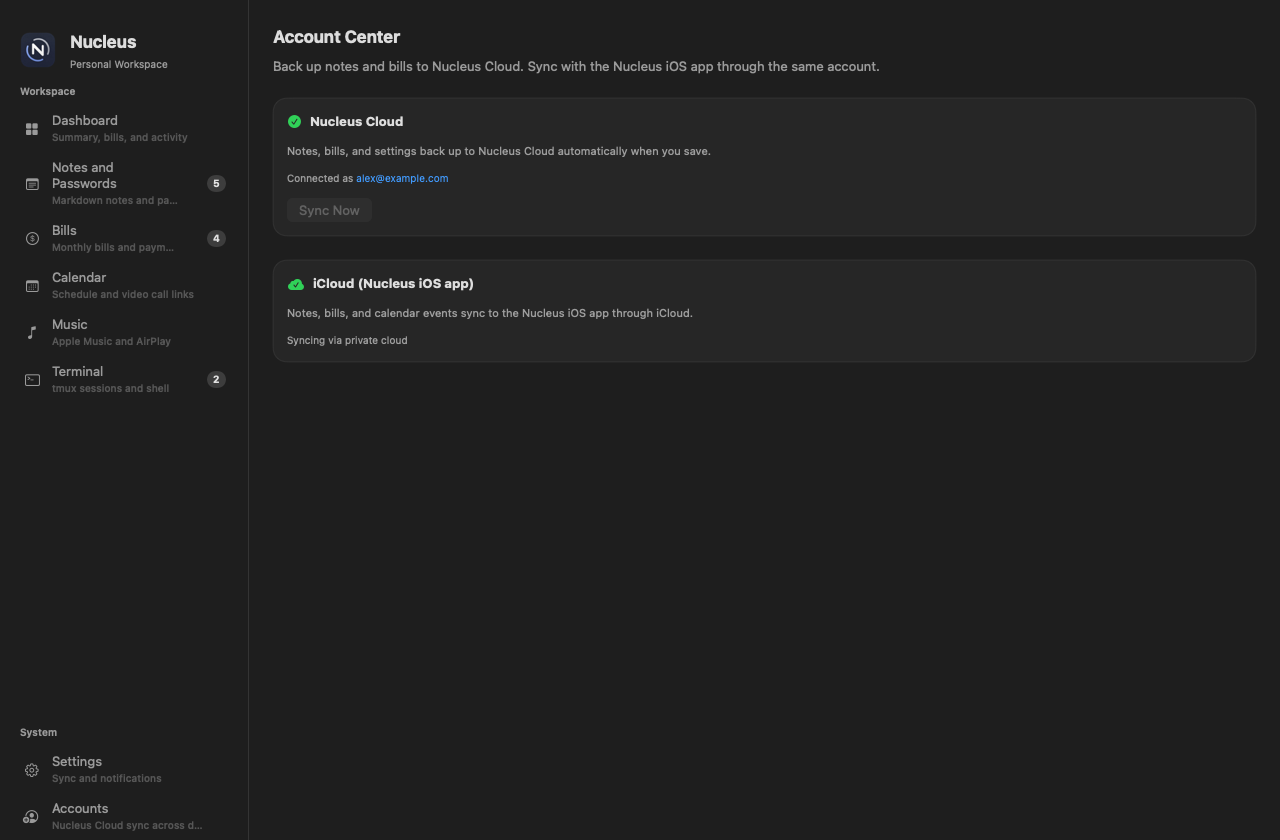
In the macOS sidebar, choose Accounts under System. You will see Nucleus Cloud and iCloud cards.
Step 2
Connect Nucleus Cloud
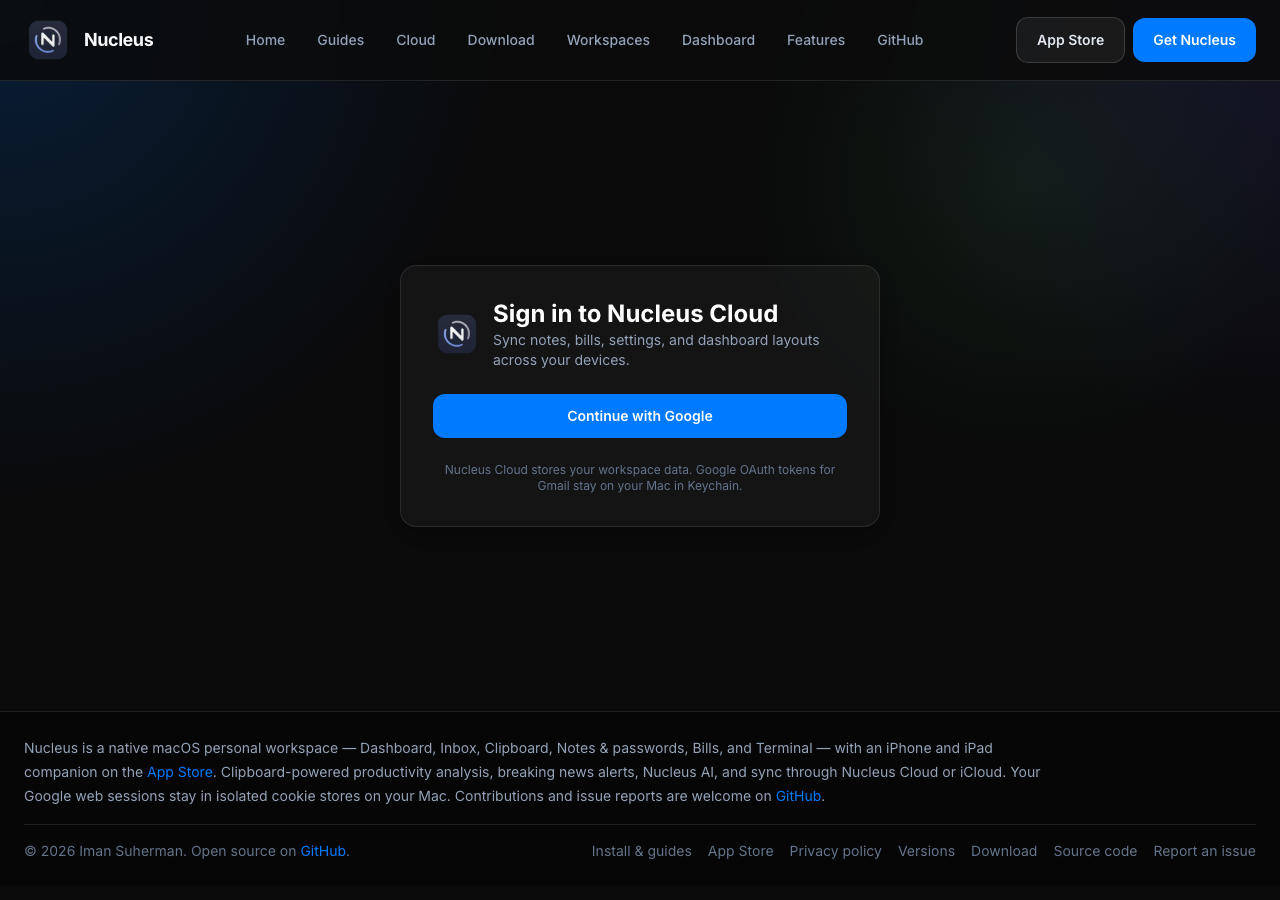
Click Connect Nucleus Cloud. Your browser opens to the Nucleus website. Sign in with Google and authorize this Mac.
- After authorization, return to Nucleus — sync starts automatically.
- You can also finish via the net.suherman.nucleus:// deep link if the browser offers it.
Step 3
Confirm connected status
Account Center shows Connected as [email protected]. Notes, bills, and settings now back up when you save.
Step 4
Sync manually if needed
Tap Sync Now in Account Center or Settings → Nucleus Cloud to push and pull immediately. Useful after bulk edits or before opening the mobile app.
Good to know
- Nucleus Cloud stores notes, bills, bill payments, synced settings, and dashboard analysis.
- Your Mac pushes on save (debounced ~2 seconds). Mobile pulls when you connect or tap sync.
Install on iPhone & iPad
Companion app v1.0.4. Dashboard, notes, passwords, bills, and settings sync with Nucleus on your Mac. Apple Watch shows bills due, your next meeting, and sync status. Requires iOS 17 or later.
Step 1
Install from the App Store
Search for Nucleus on the App Store or use the link on the website. Requires iOS 17 or later. Works on iPhone and iPad.
Step 2
Open Settings
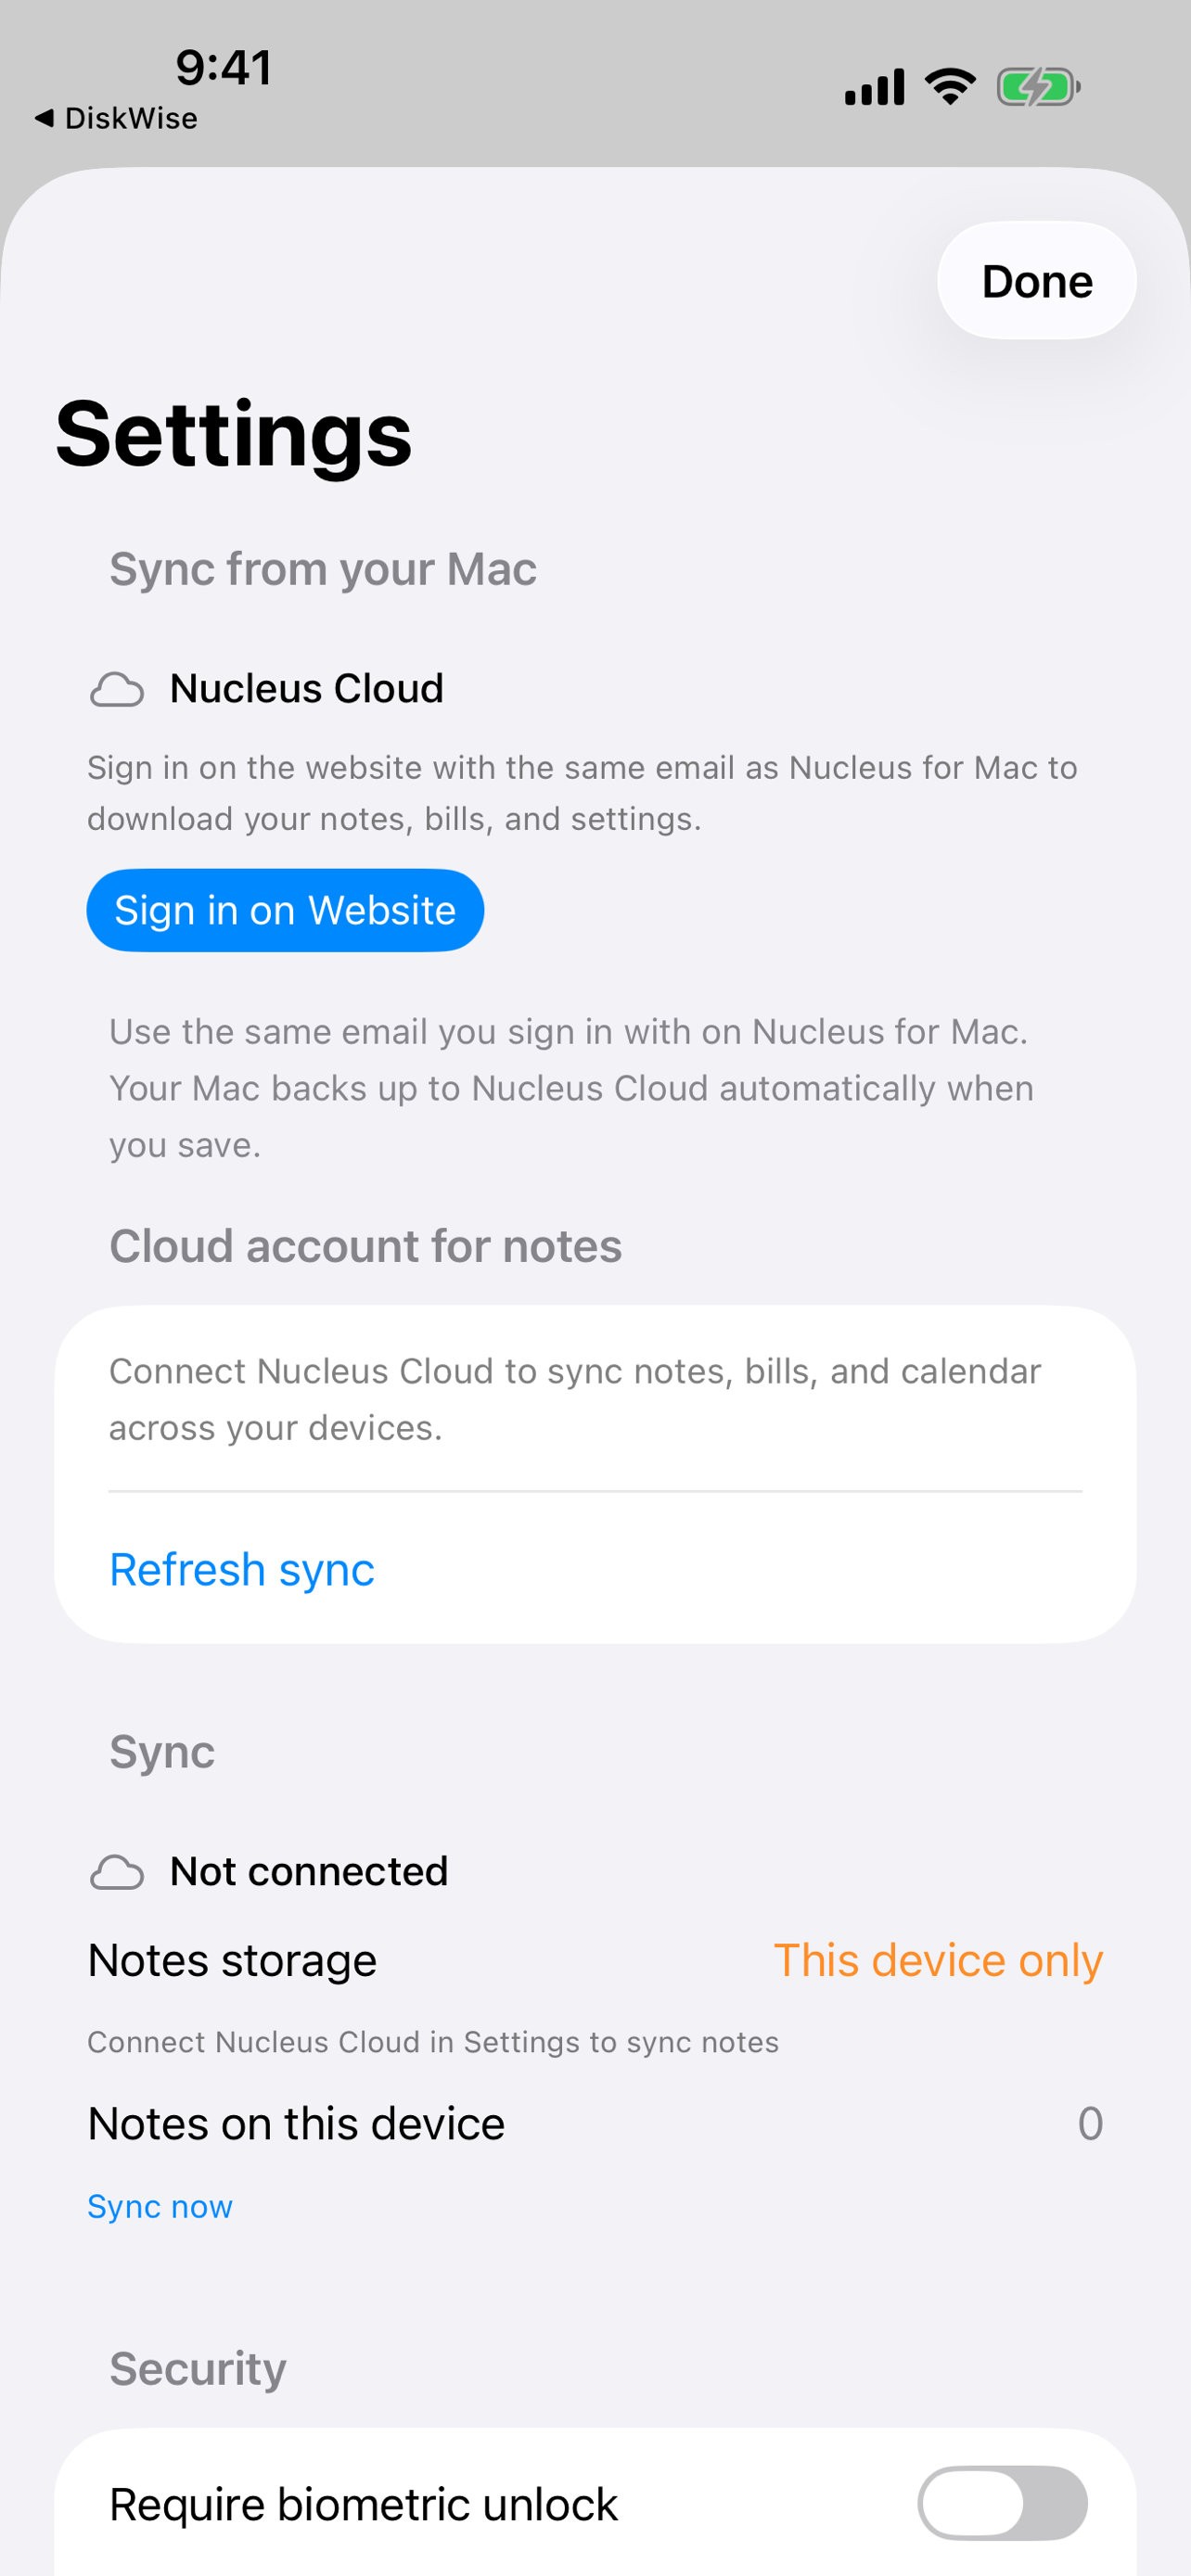
Tap the gear icon on any workspace screen. If you are not yet synced, a Sync from your Mac section appears at the top.
Step 3
Sign in on the website
Tap Sign in on Website. Safari opens the Nucleus connect flow. Sign in with the same Google account you use on your Mac and authorize this device.
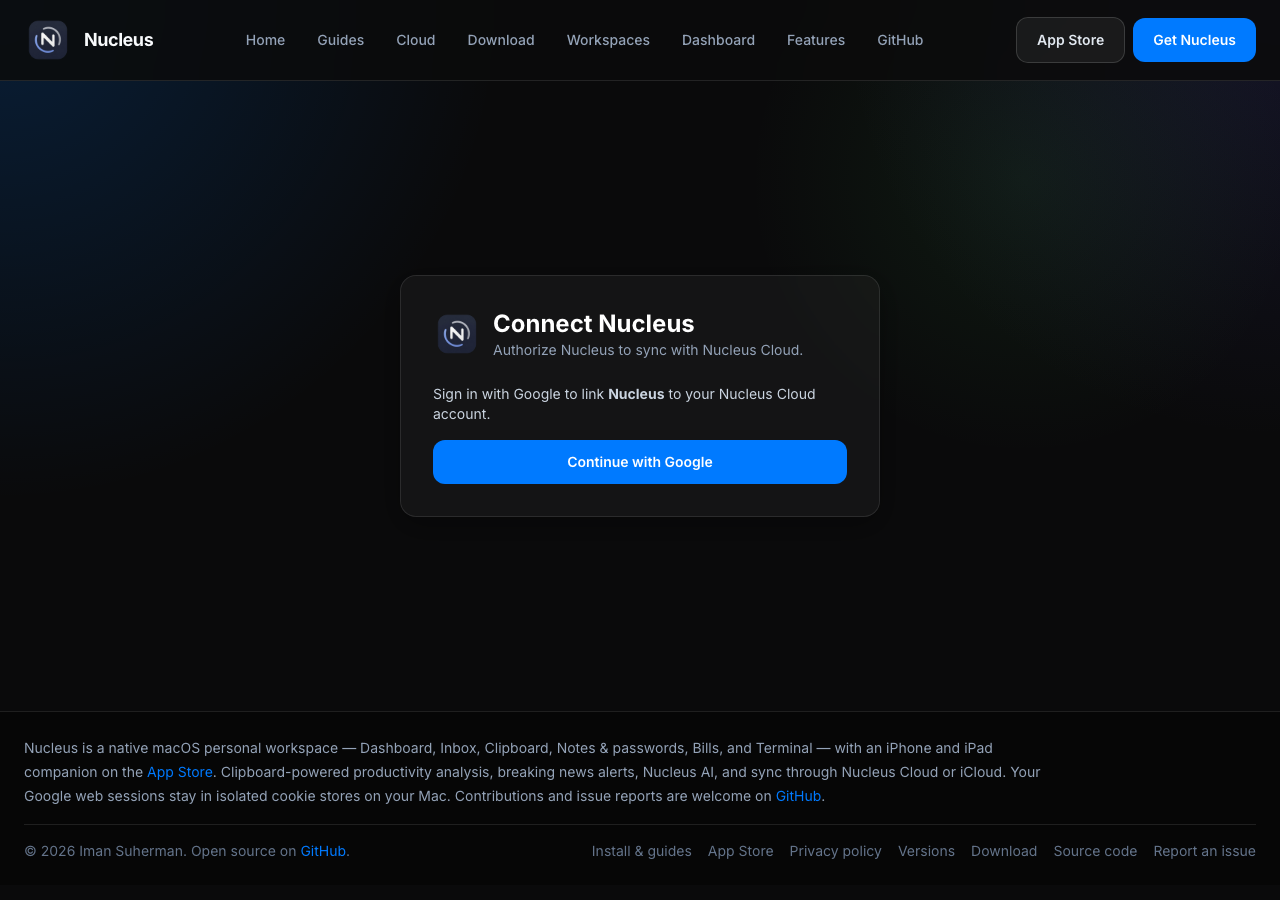
- Return to Nucleus after approving — the app syncs automatically.
- If the browser deep-links back, Nucleus completes the connection without extra steps.
Step 4
Confirm your data
Open Notes, Passwords, and Bills. Pull down to refresh on any list. Your Mac data should appear within a minute on first sync.
Step 5
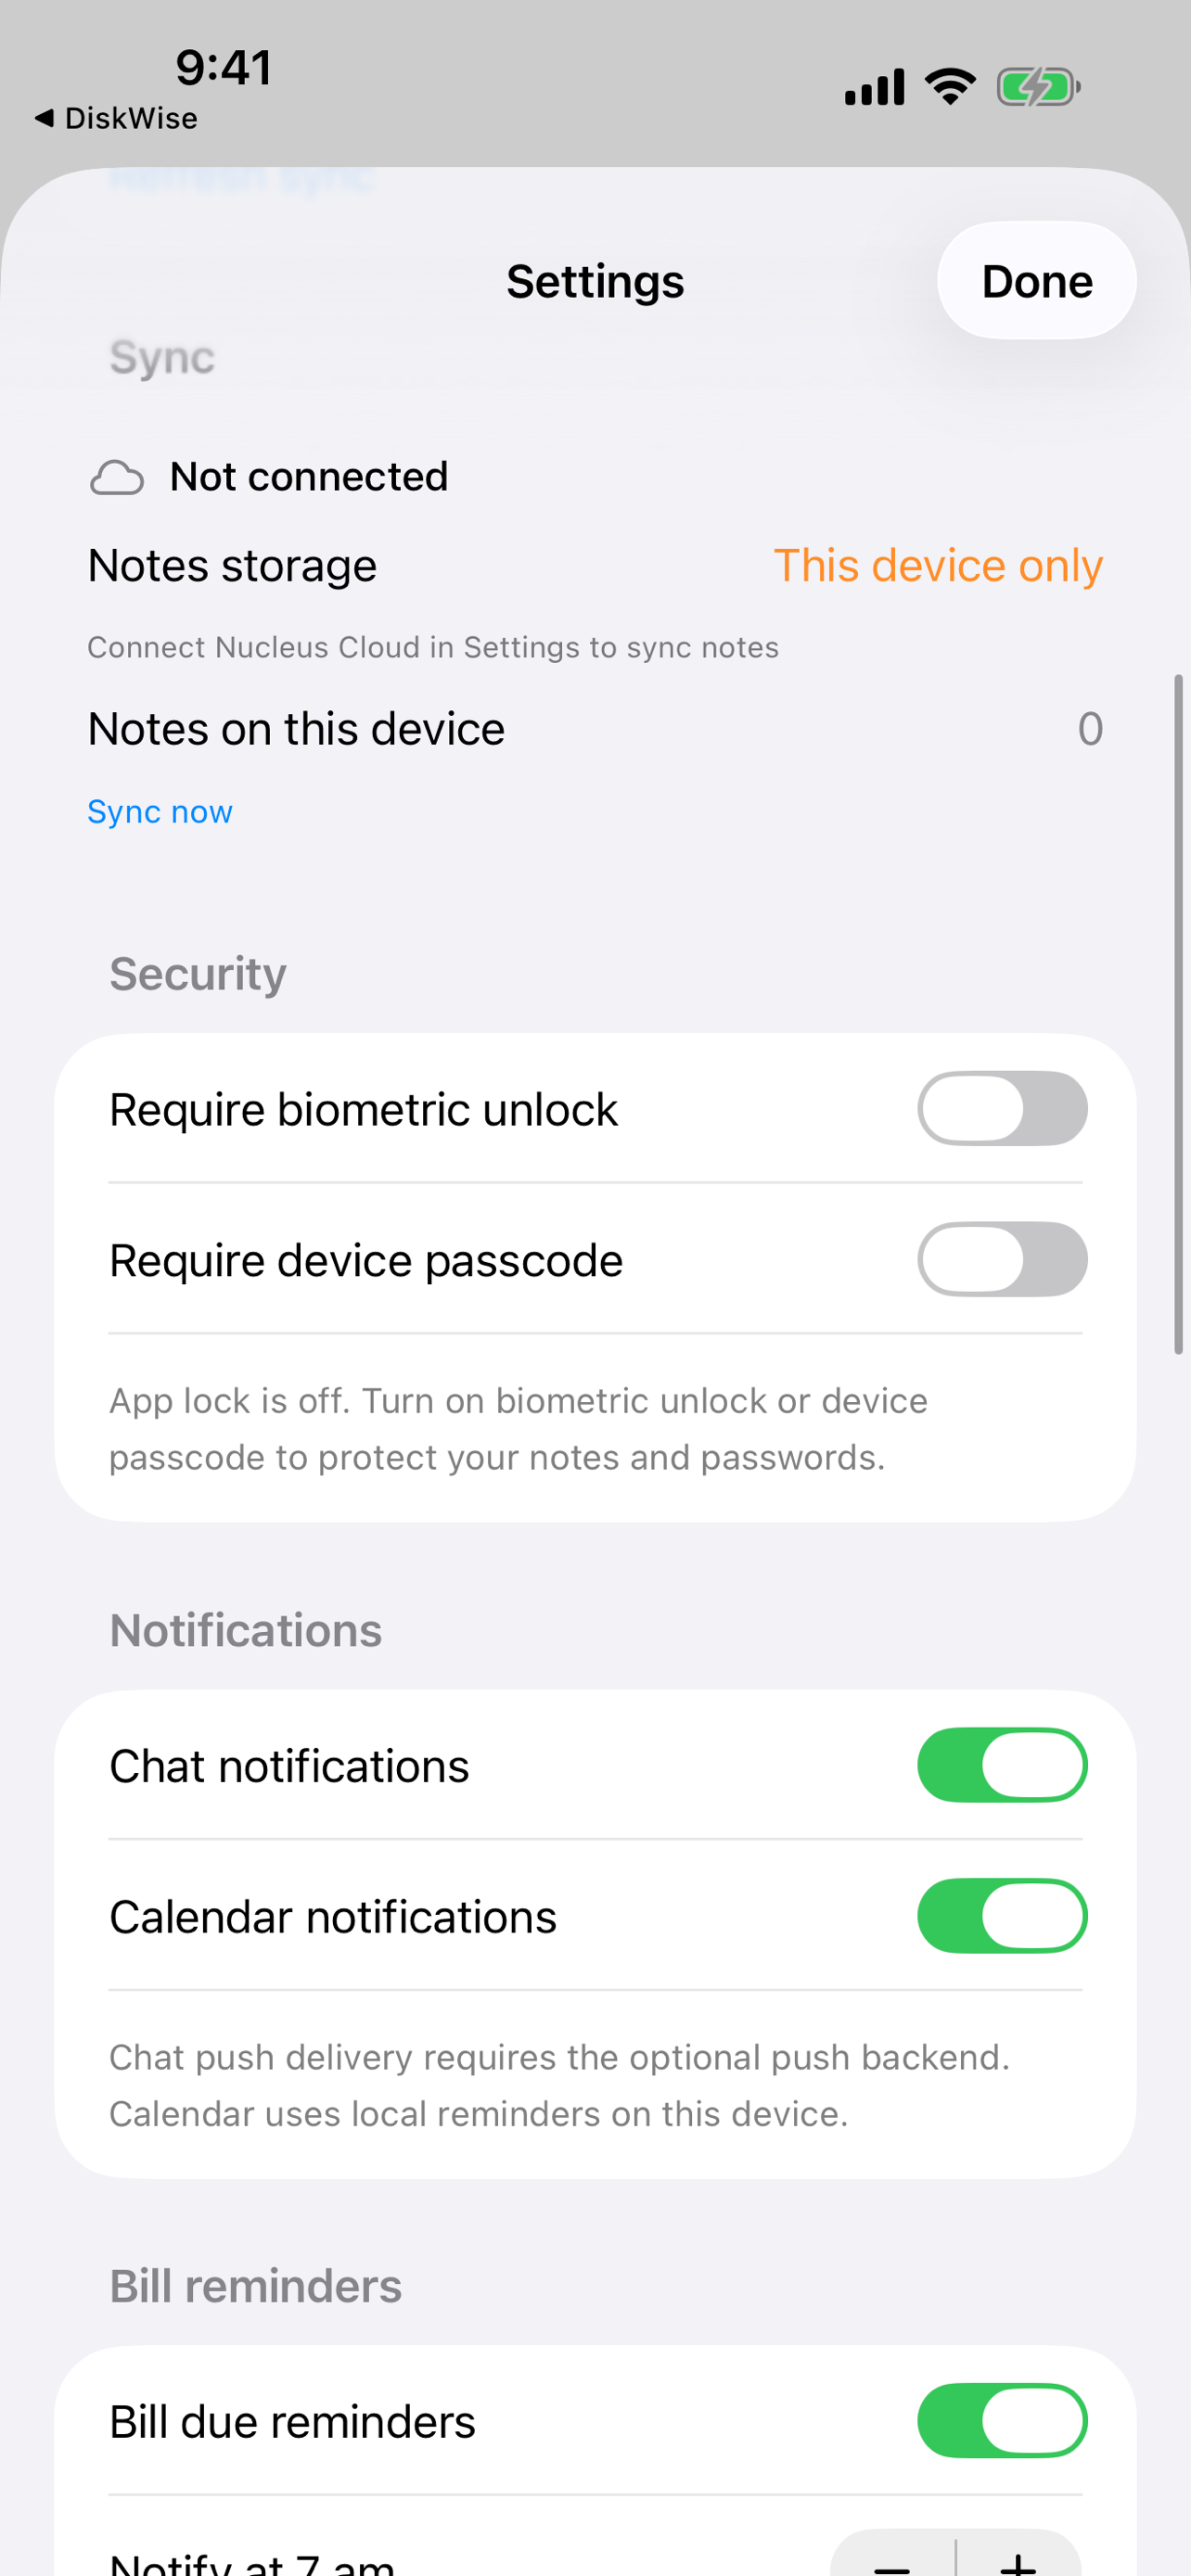
Enable app lock (recommended)
In Settings → Security, turn on Face ID, Touch ID, or device passcode. Nucleus locks when you leave the app to protect notes and passwords.
Install on Android
Companion app v1.0.0 (debug APK). Dashboard, notes, passwords, bills, and calendar sync with Nucleus on your Mac via Nucleus Cloud. Requires Android 8.0 (API 26) or later.
Step 1
Download the APK
Use the Download for Android button below. This is a debug build for sideloading — not yet on Google Play.
Step 2
Allow installation
When your browser finishes downloading, open the APK. If Android blocks unknown apps, go to Settings and allow installs from Chrome, Files, or your browser.
Step 3
Install and open Nucleus
Tap Install, then open Nucleus. Requires Android 8.0 (API 26) or later.
Step 4
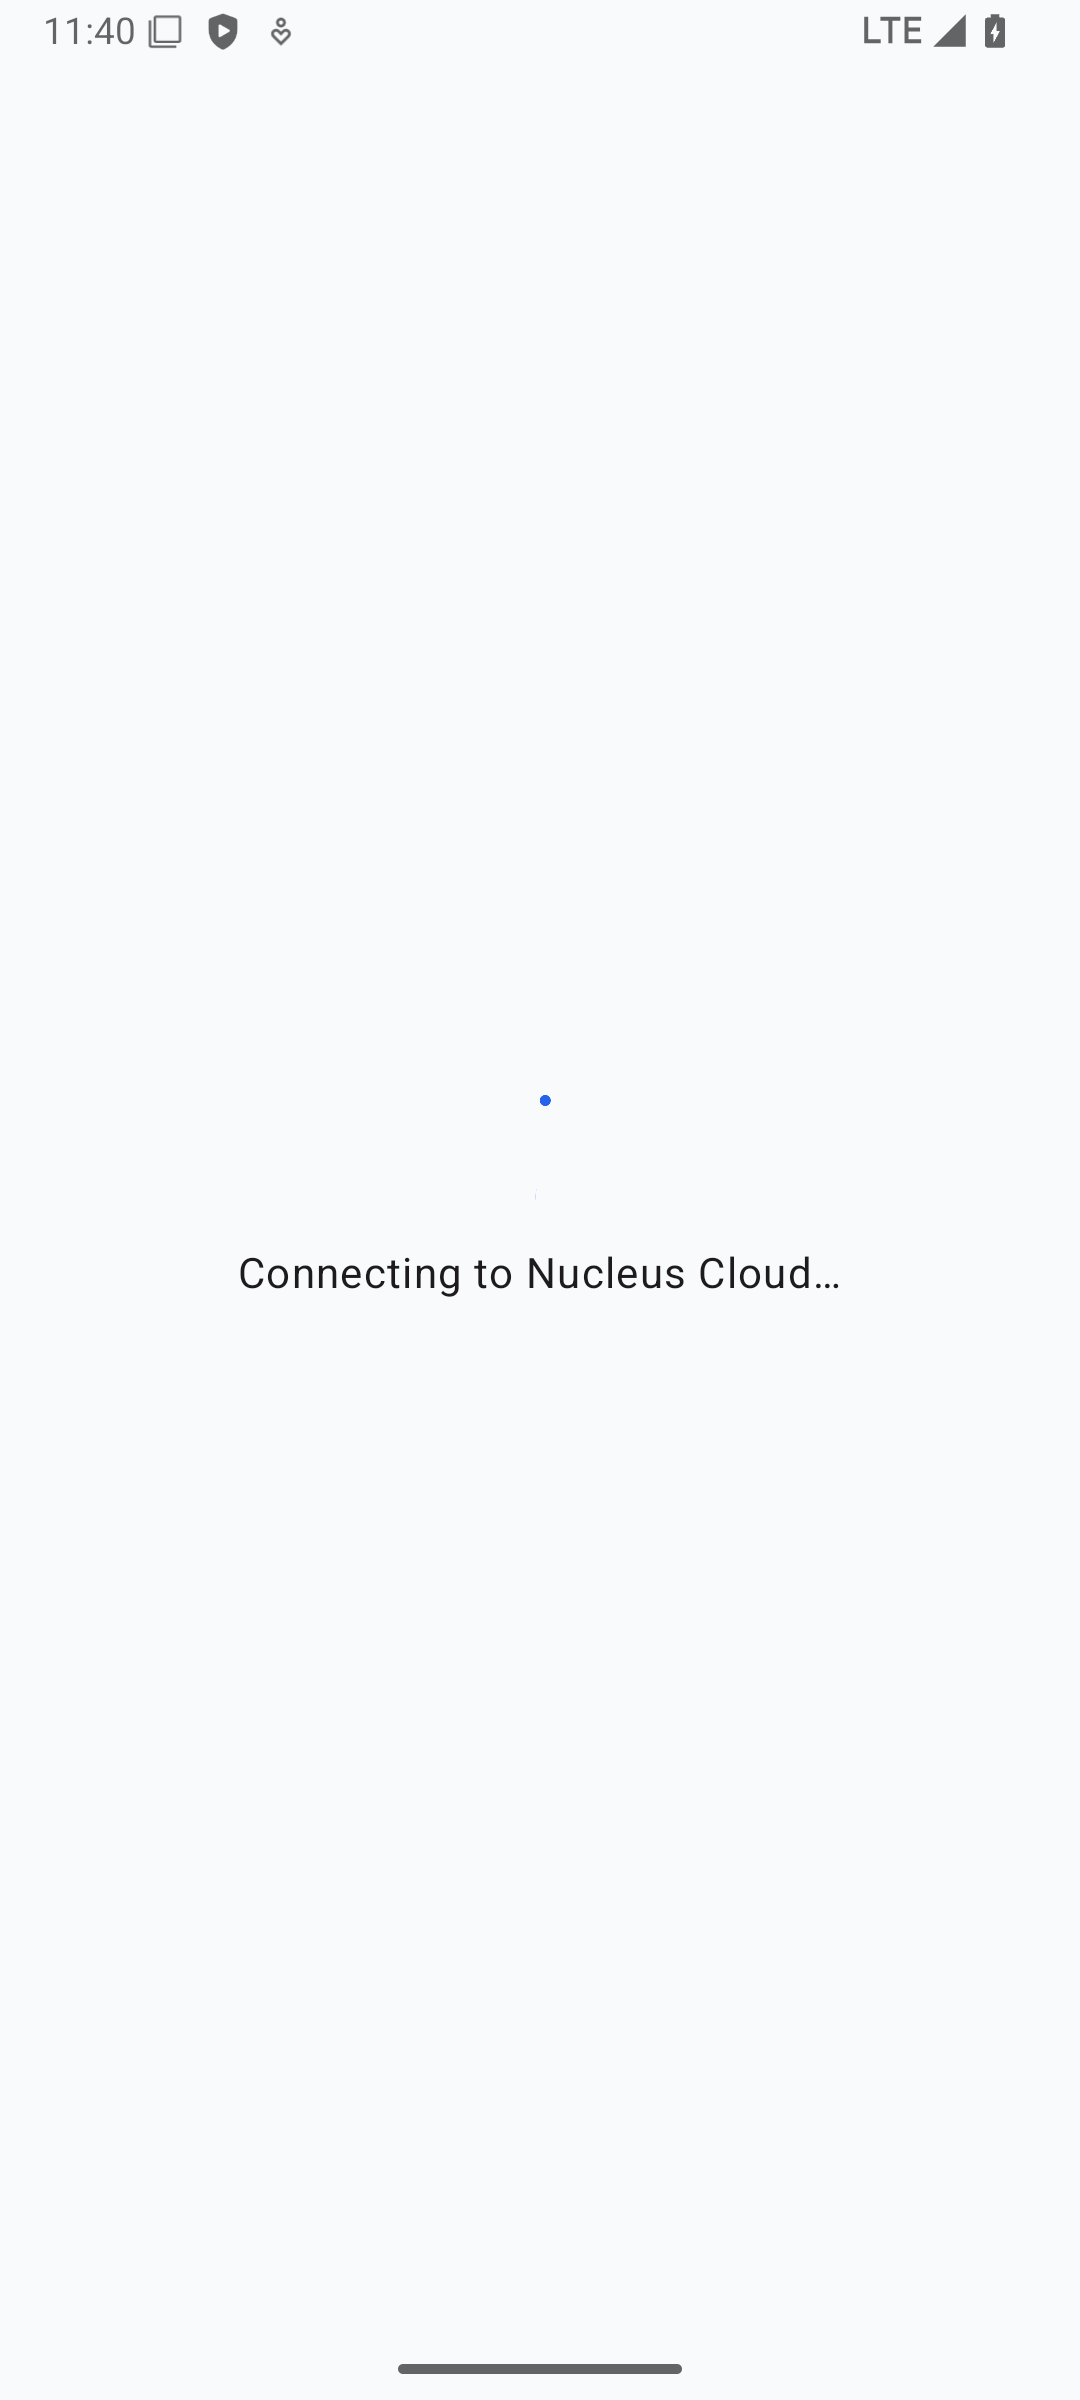
Sign in on the website
Open Settings and tap Sign in on Website. Complete Google sign-in in your browser with the same account you use on your Mac.
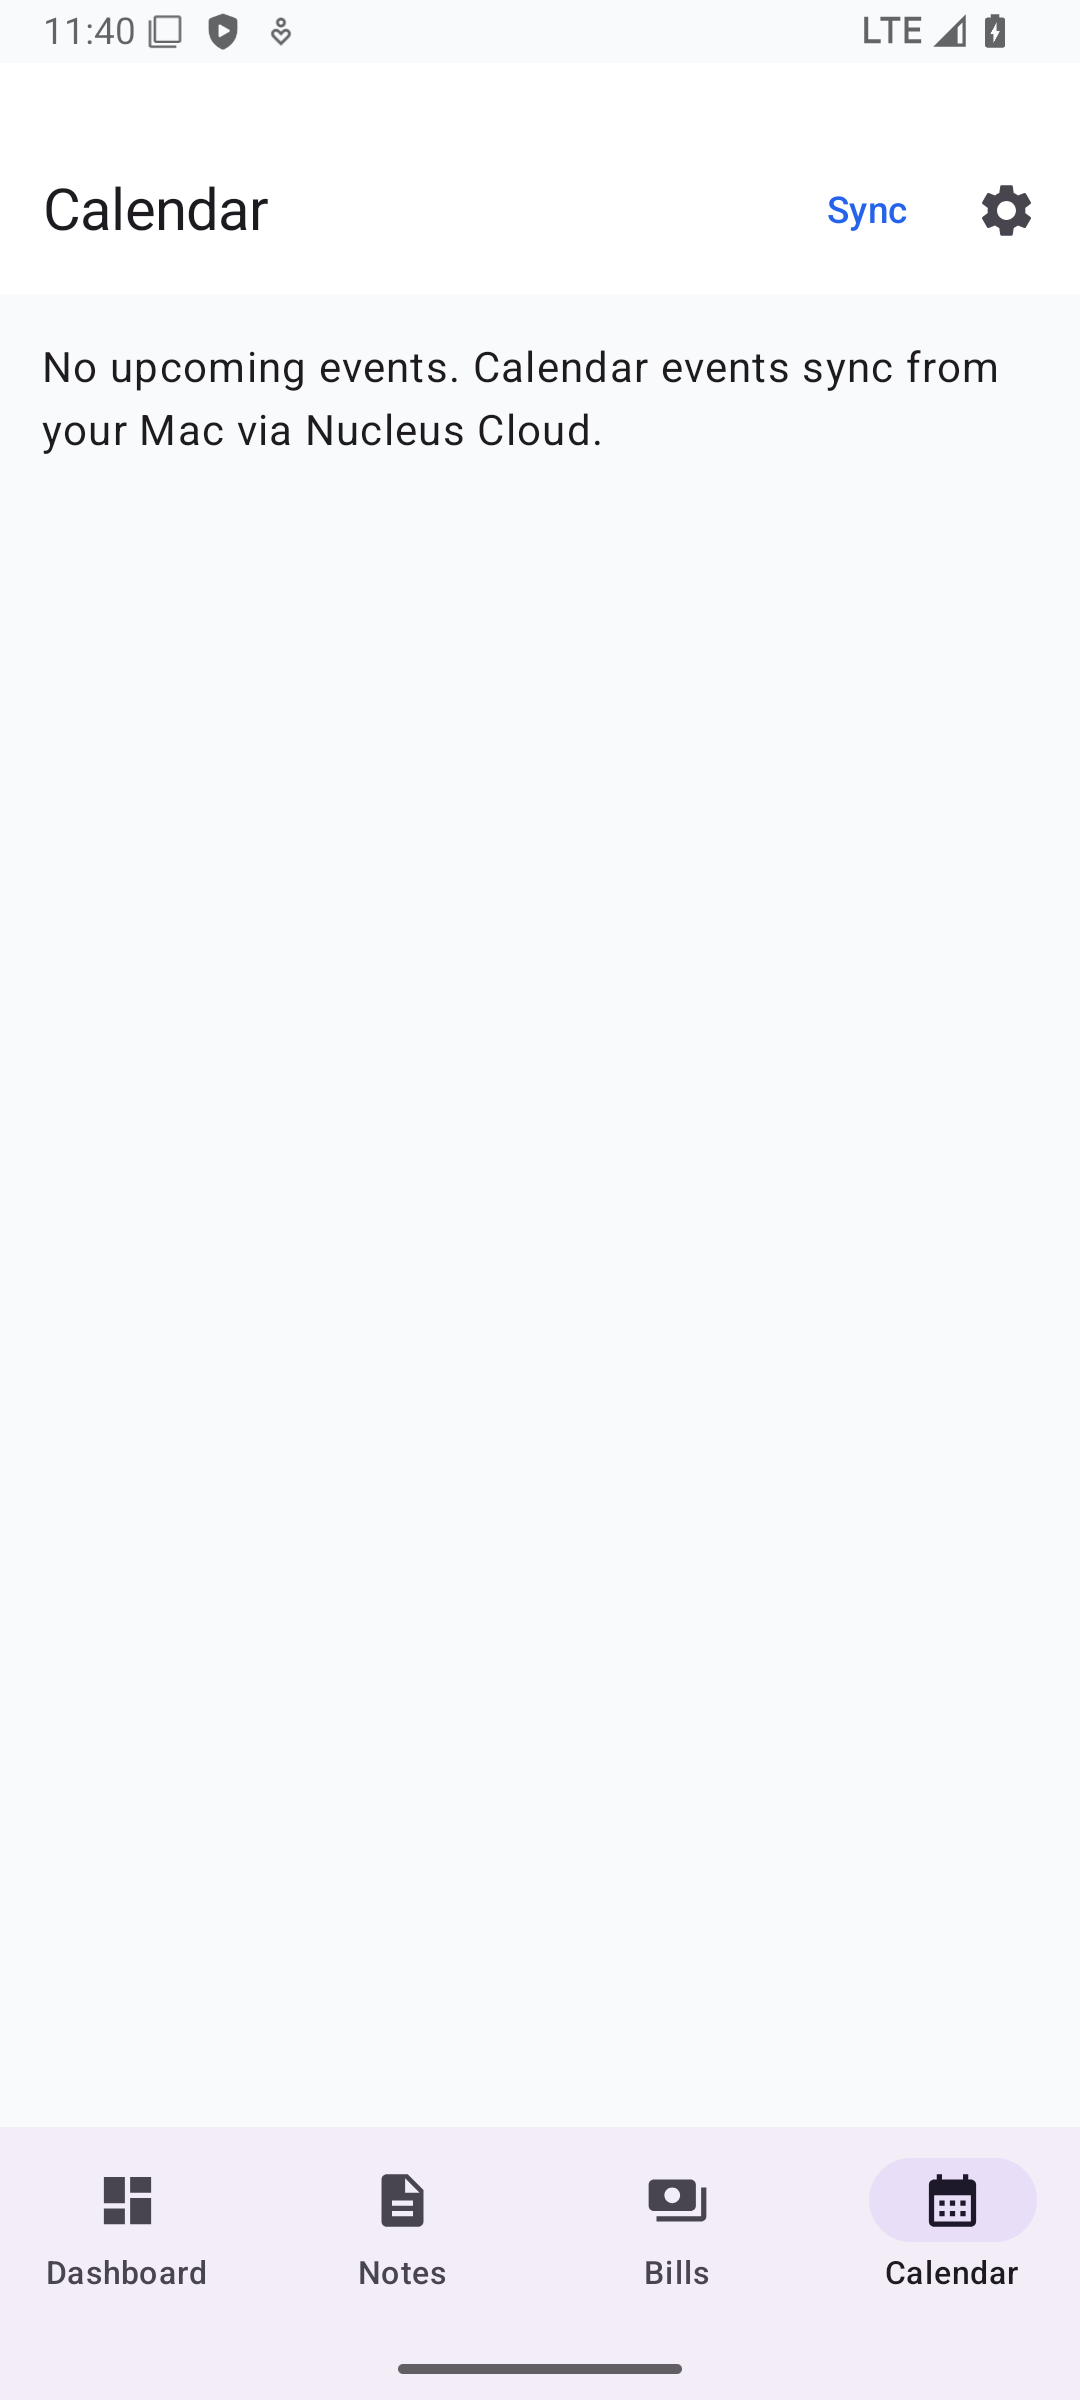
- Return to Nucleus after approving — the app receives a deep link and connects automatically.
Step 5
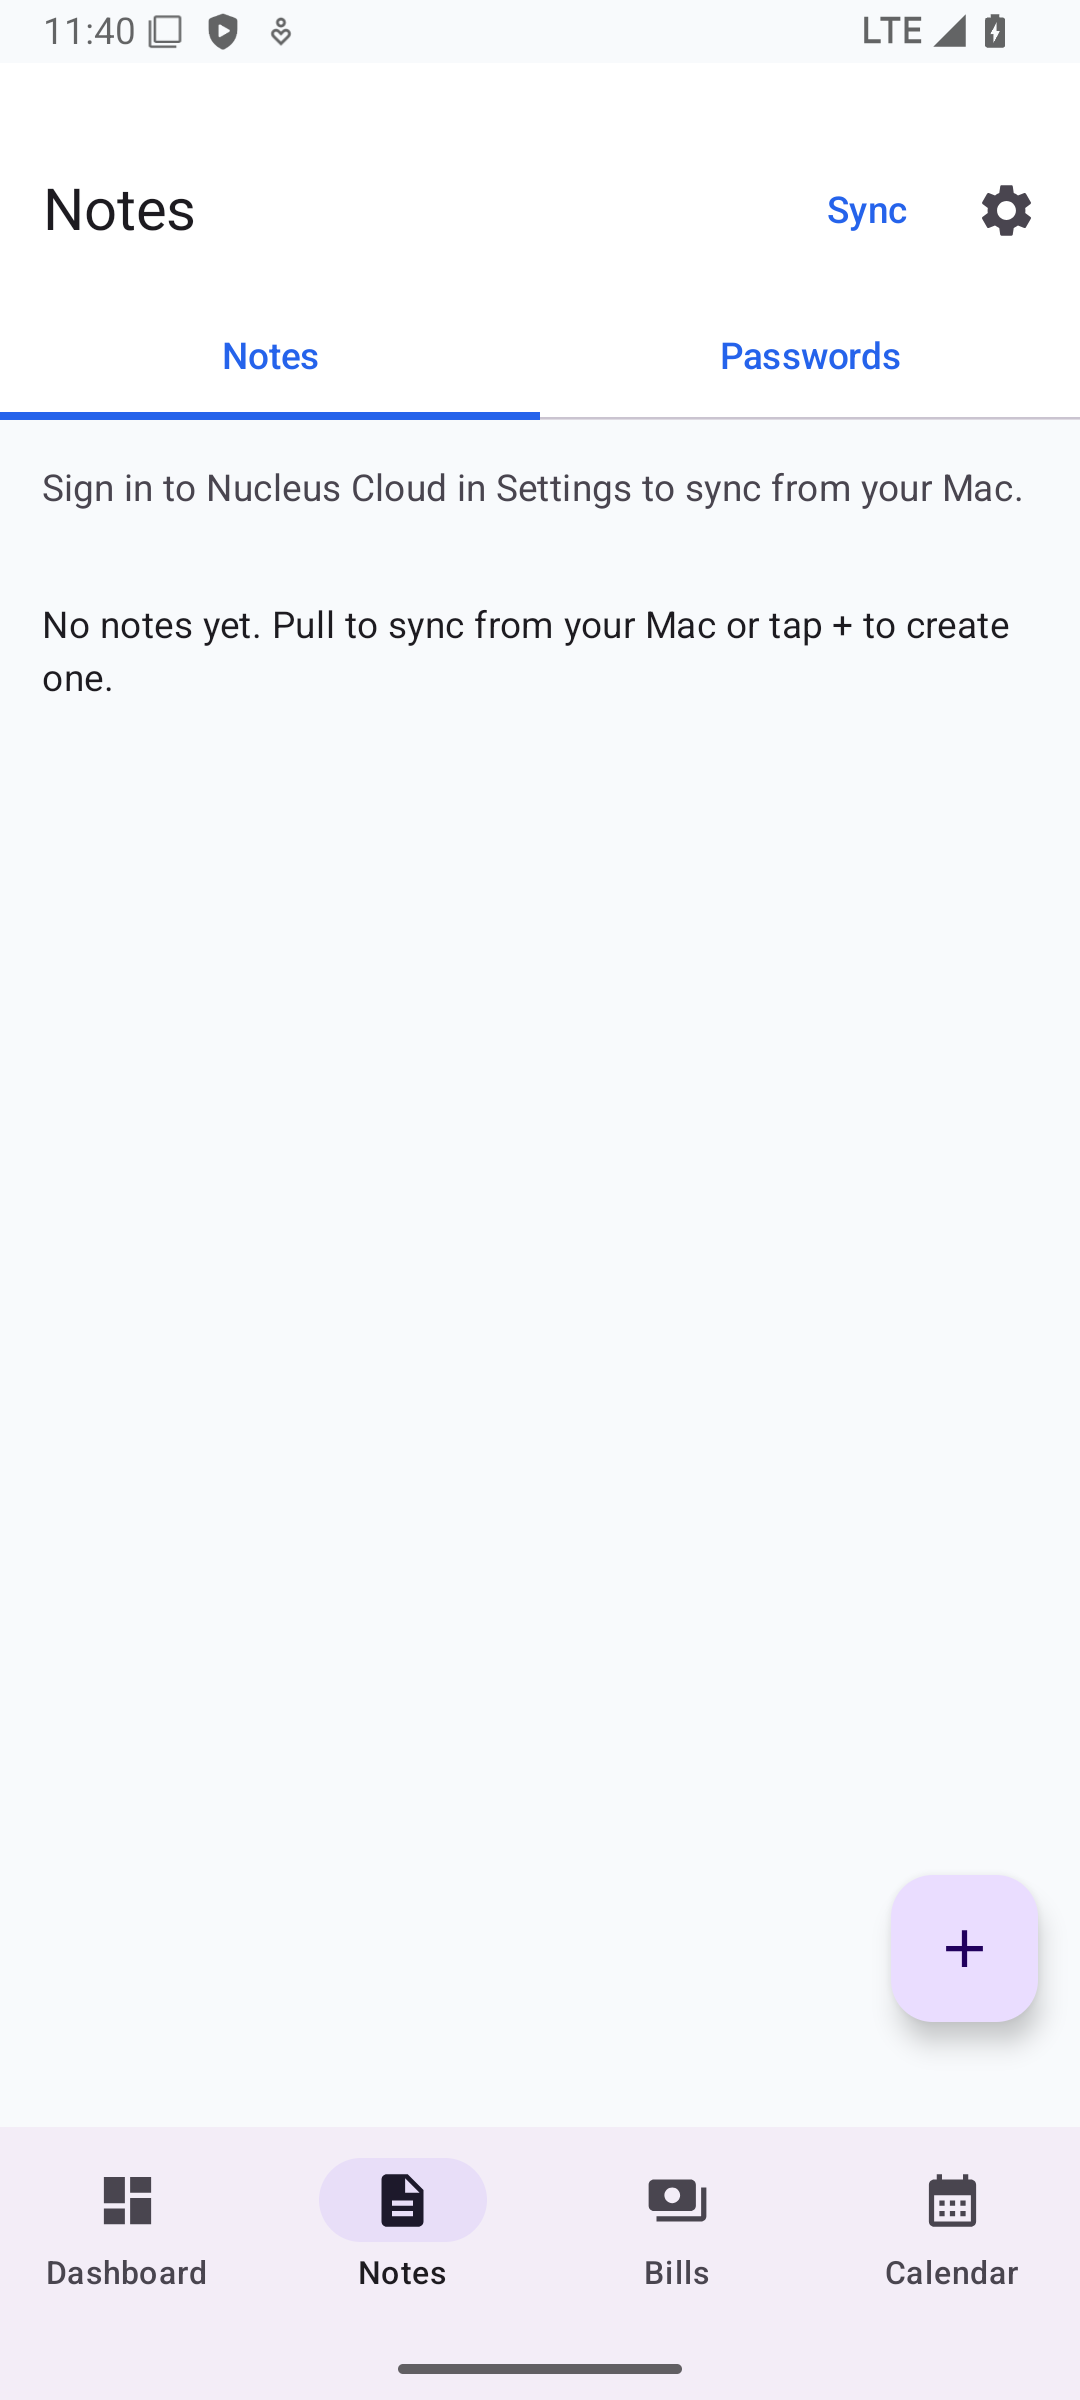
Sync your workspace
Tap Sync from Nucleus Cloud in Settings. Notes, passwords, bills, and calendar events from your Mac appear on your phone.
Good to know
- Mail, Chat, and Terminal are macOS-only workspaces.
- Calendar events on Android come from events synced via Nucleus Cloud from your Mac.
Step-by-step: Apple Watch setup
The Nucleus watch app is a read-only glance at your workspace — bills due, next meeting, notes count, and sync status. Data comes from your iPhone automatically.
Step 1
Install on your Apple Watch
Nucleus includes a watch companion. After installing Nucleus on iPhone, open the Watch app on iPhone and confirm Nucleus is installed on your paired watch.
Step 2
Open Nucleus on iPhone first
Launch Nucleus on your iPhone and sign in to Nucleus Cloud. The watch app receives an updated snapshot when your iPhone loads bills, calendar, and notes.
Step 3
Check your wrist
Open Nucleus on Apple Watch. You will see your next meeting countdown, bills due soon, total notes on iPhone, and whether Nucleus Cloud is connected.
Step 4
Keep it current
Open Nucleus on iPhone periodically — after bill payments, calendar changes, or cloud sync. The watch updates automatically via WatchConnectivity.
- The watch app is read-only. Edit notes and log bill payments on iPhone or iPad.
Good to know
- Requires watchOS 10 or later and a paired iPhone running Nucleus.
- Password entries are not shown on Apple Watch for security.
How sync works between devices
Understand what travels between your Mac and mobile, and how to keep both sides up to date.
Step 1
Mac → Cloud (automatic)
When Nucleus Cloud is connected on macOS, saving a note or bill triggers a cloud sync within a few seconds. No manual export needed.
Step 2
Cloud → Mobile (on demand + startup)
On iPhone, iPad, or Android, Nucleus pulls from Nucleus Cloud when you connect, on app launch (if already signed in), or when you tap Sync from Nucleus Cloud in Settings.
Step 3
Mobile → Cloud → Mac
Edits on mobile (new notes, bill payments, notification preference changes) save locally and push to Nucleus Cloud. Your Mac pulls them on its next sync.
Step 4
Settings sync
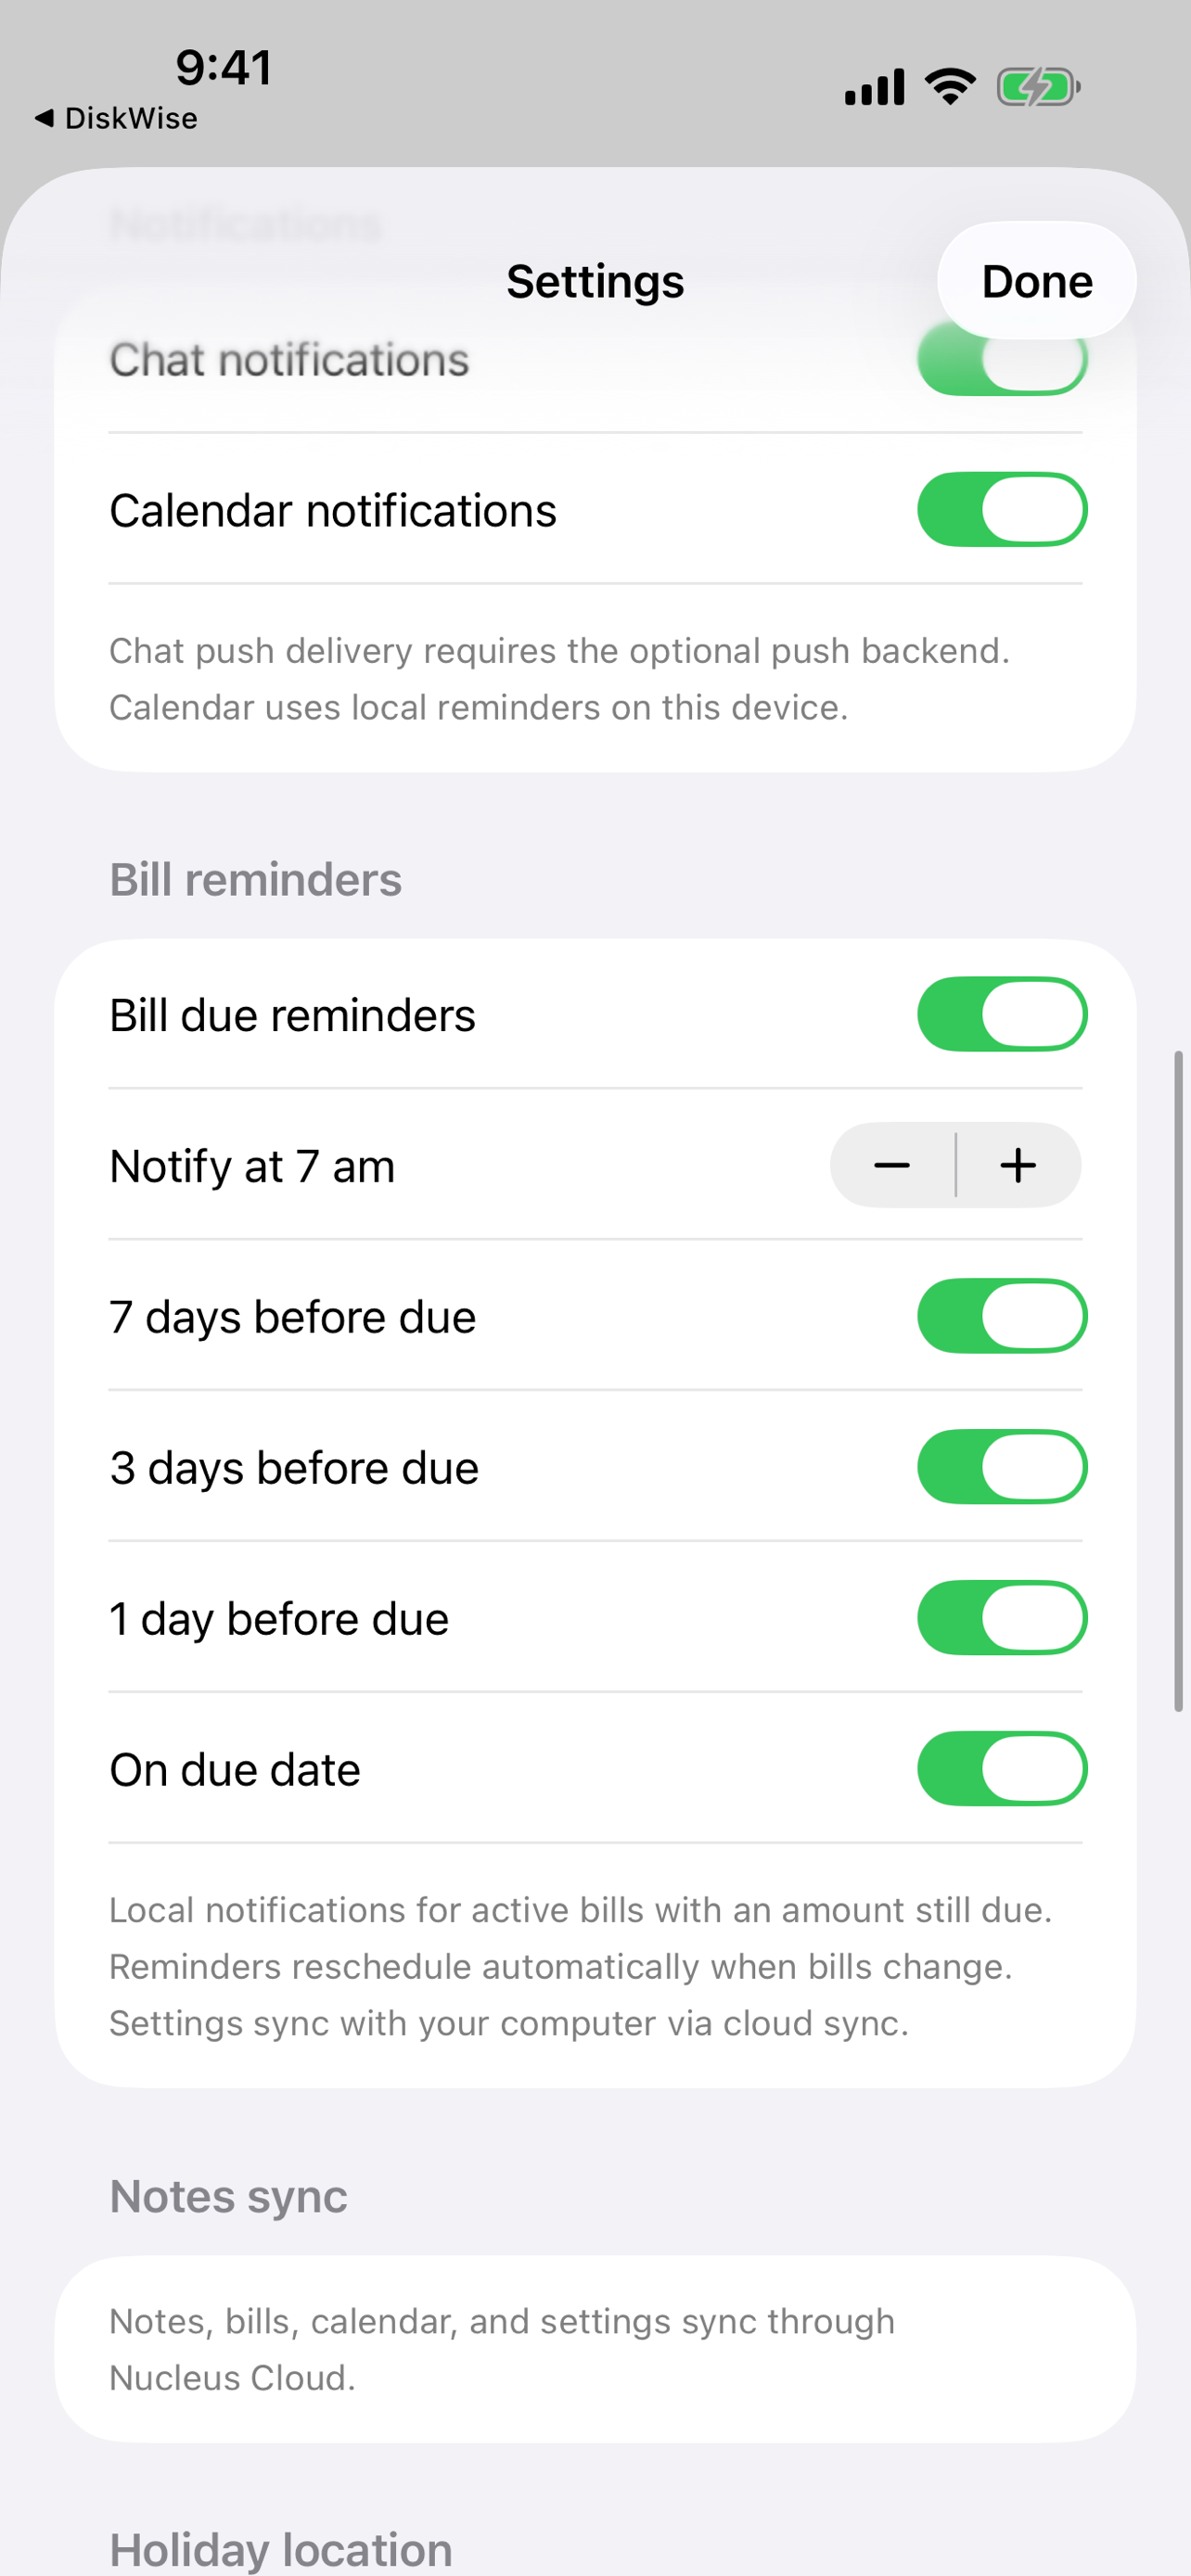
Bill reminder preferences, calendar notification toggles, and chat notification settings sync through the shared settings record. Change them on either device; the other picks them up on next sync.
Step 5
iPhone → Apple Watch
When Nucleus on iPhone loads or syncs, it pushes a lightweight snapshot to your Apple Watch — bills due, next meeting, notes count, and cloud status.
Step 6
Refresh gestures
Pull down on Notes, Passwords, or Bills to refresh from the cloud. Use Sync from Nucleus Cloud in Settings for a full reload.
Good to know
- Use the same Google email on Mac and mobile for Nucleus Cloud.
- First import on a new device can take up to a minute depending on data size.
Notifications and reminders
Bill due reminders and meeting alerts keep you on schedule. Most notifications are local on your iPhone or iPad; settings sync from your Mac.
Step 1
Allow notifications on first launch
Nucleus requests notification permission during setup. Allow alerts so bill and meeting reminders can appear.
Step 2
Bill due reminders
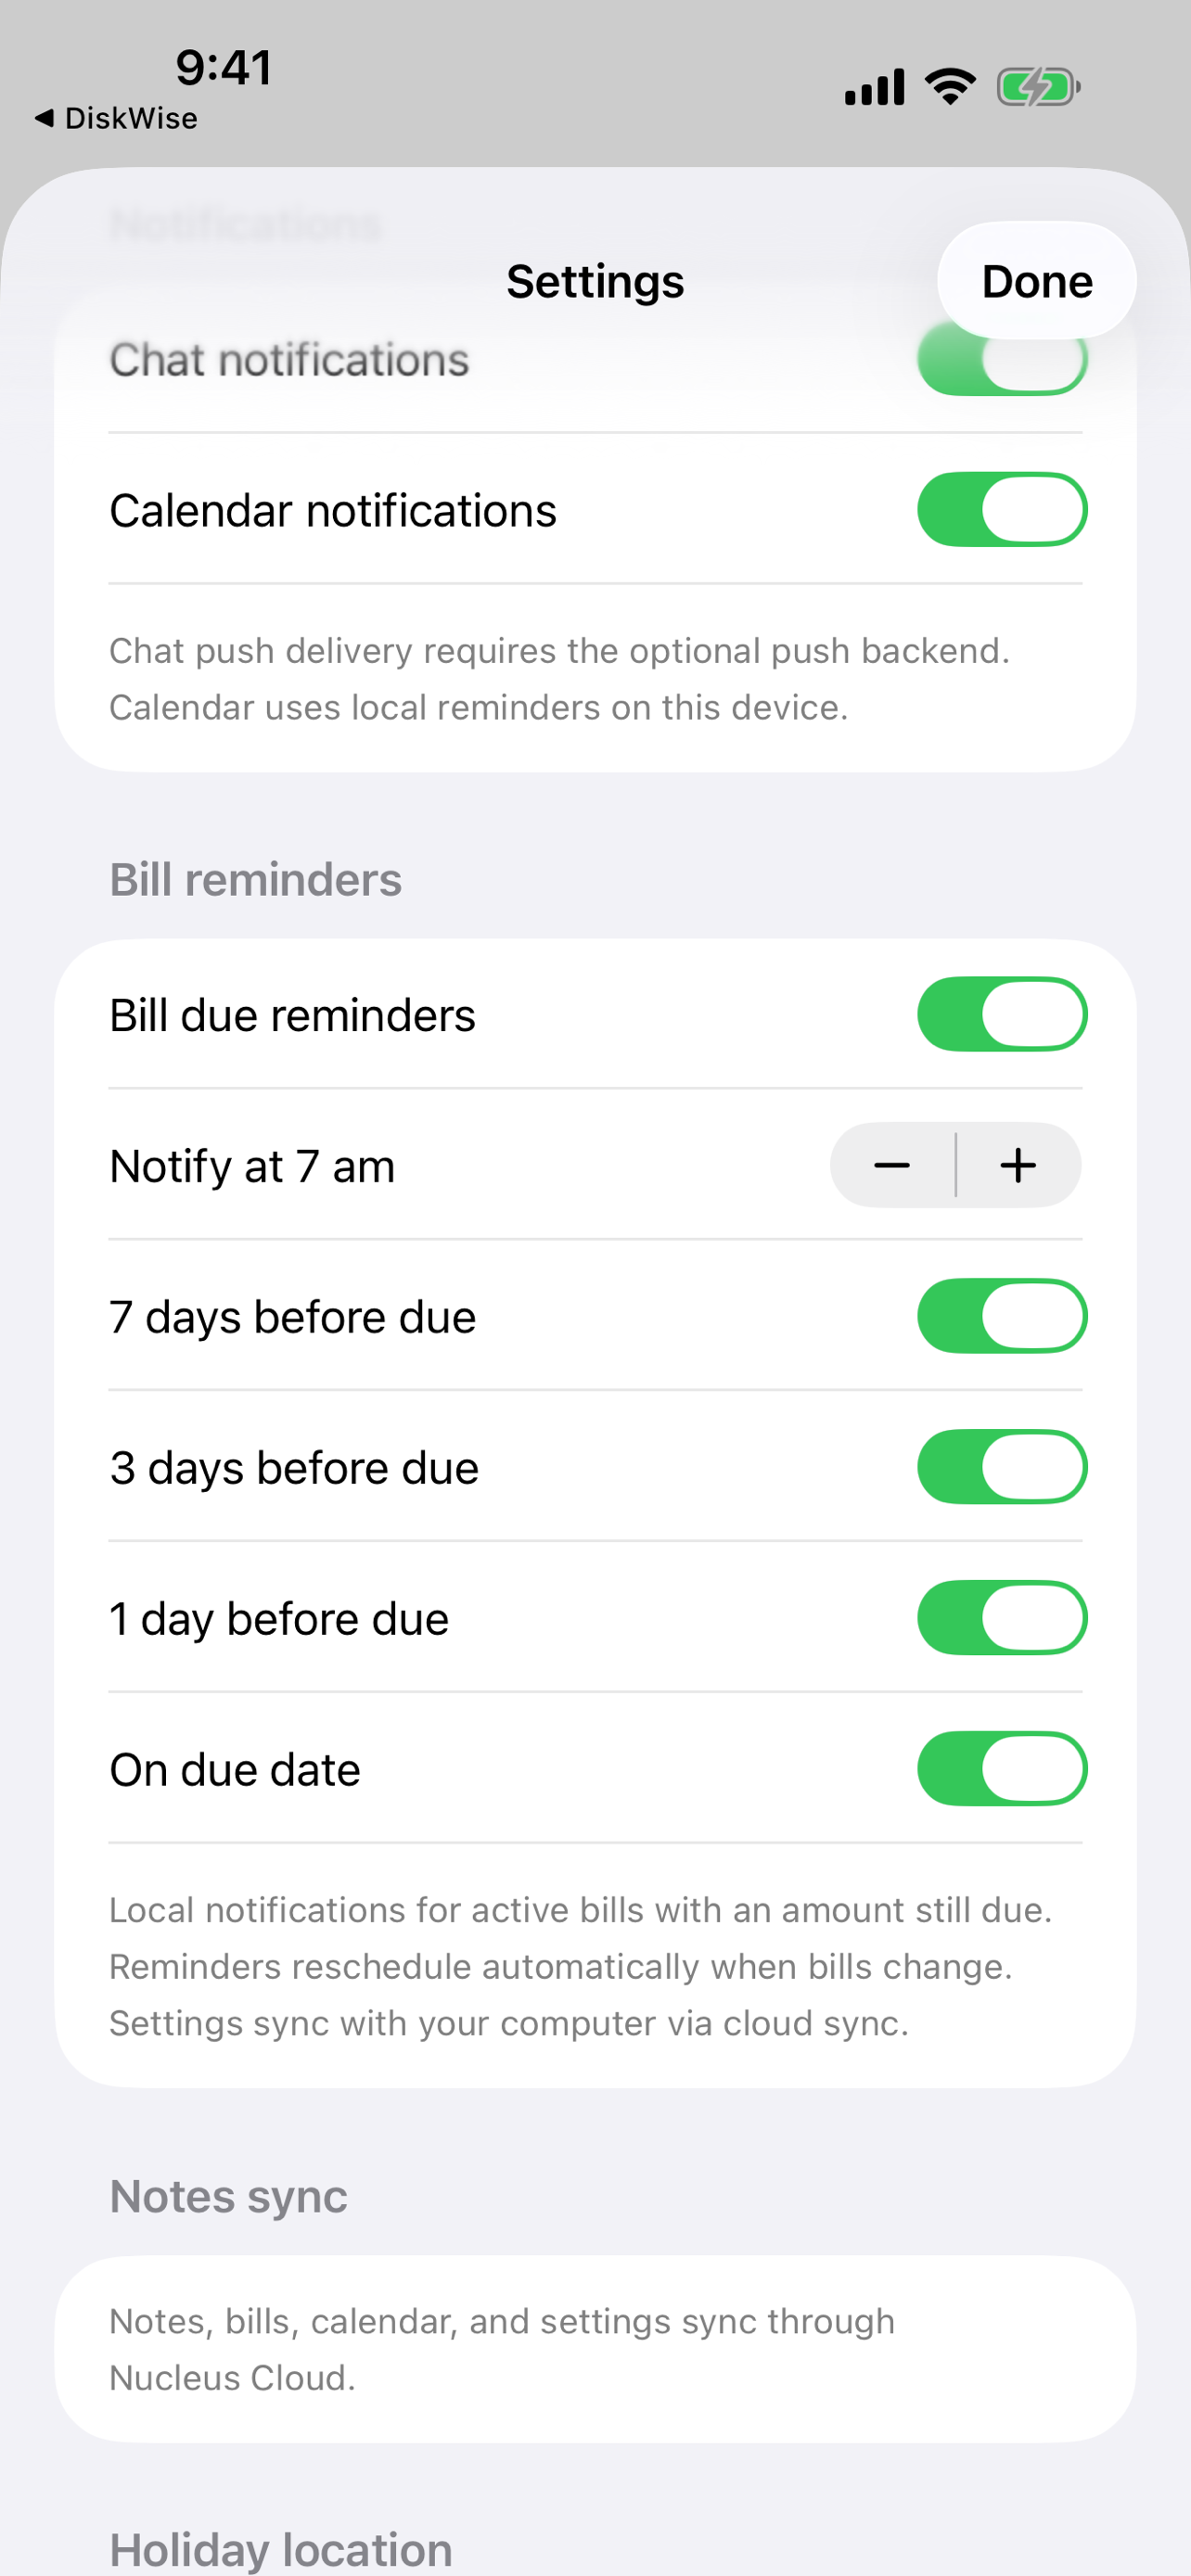
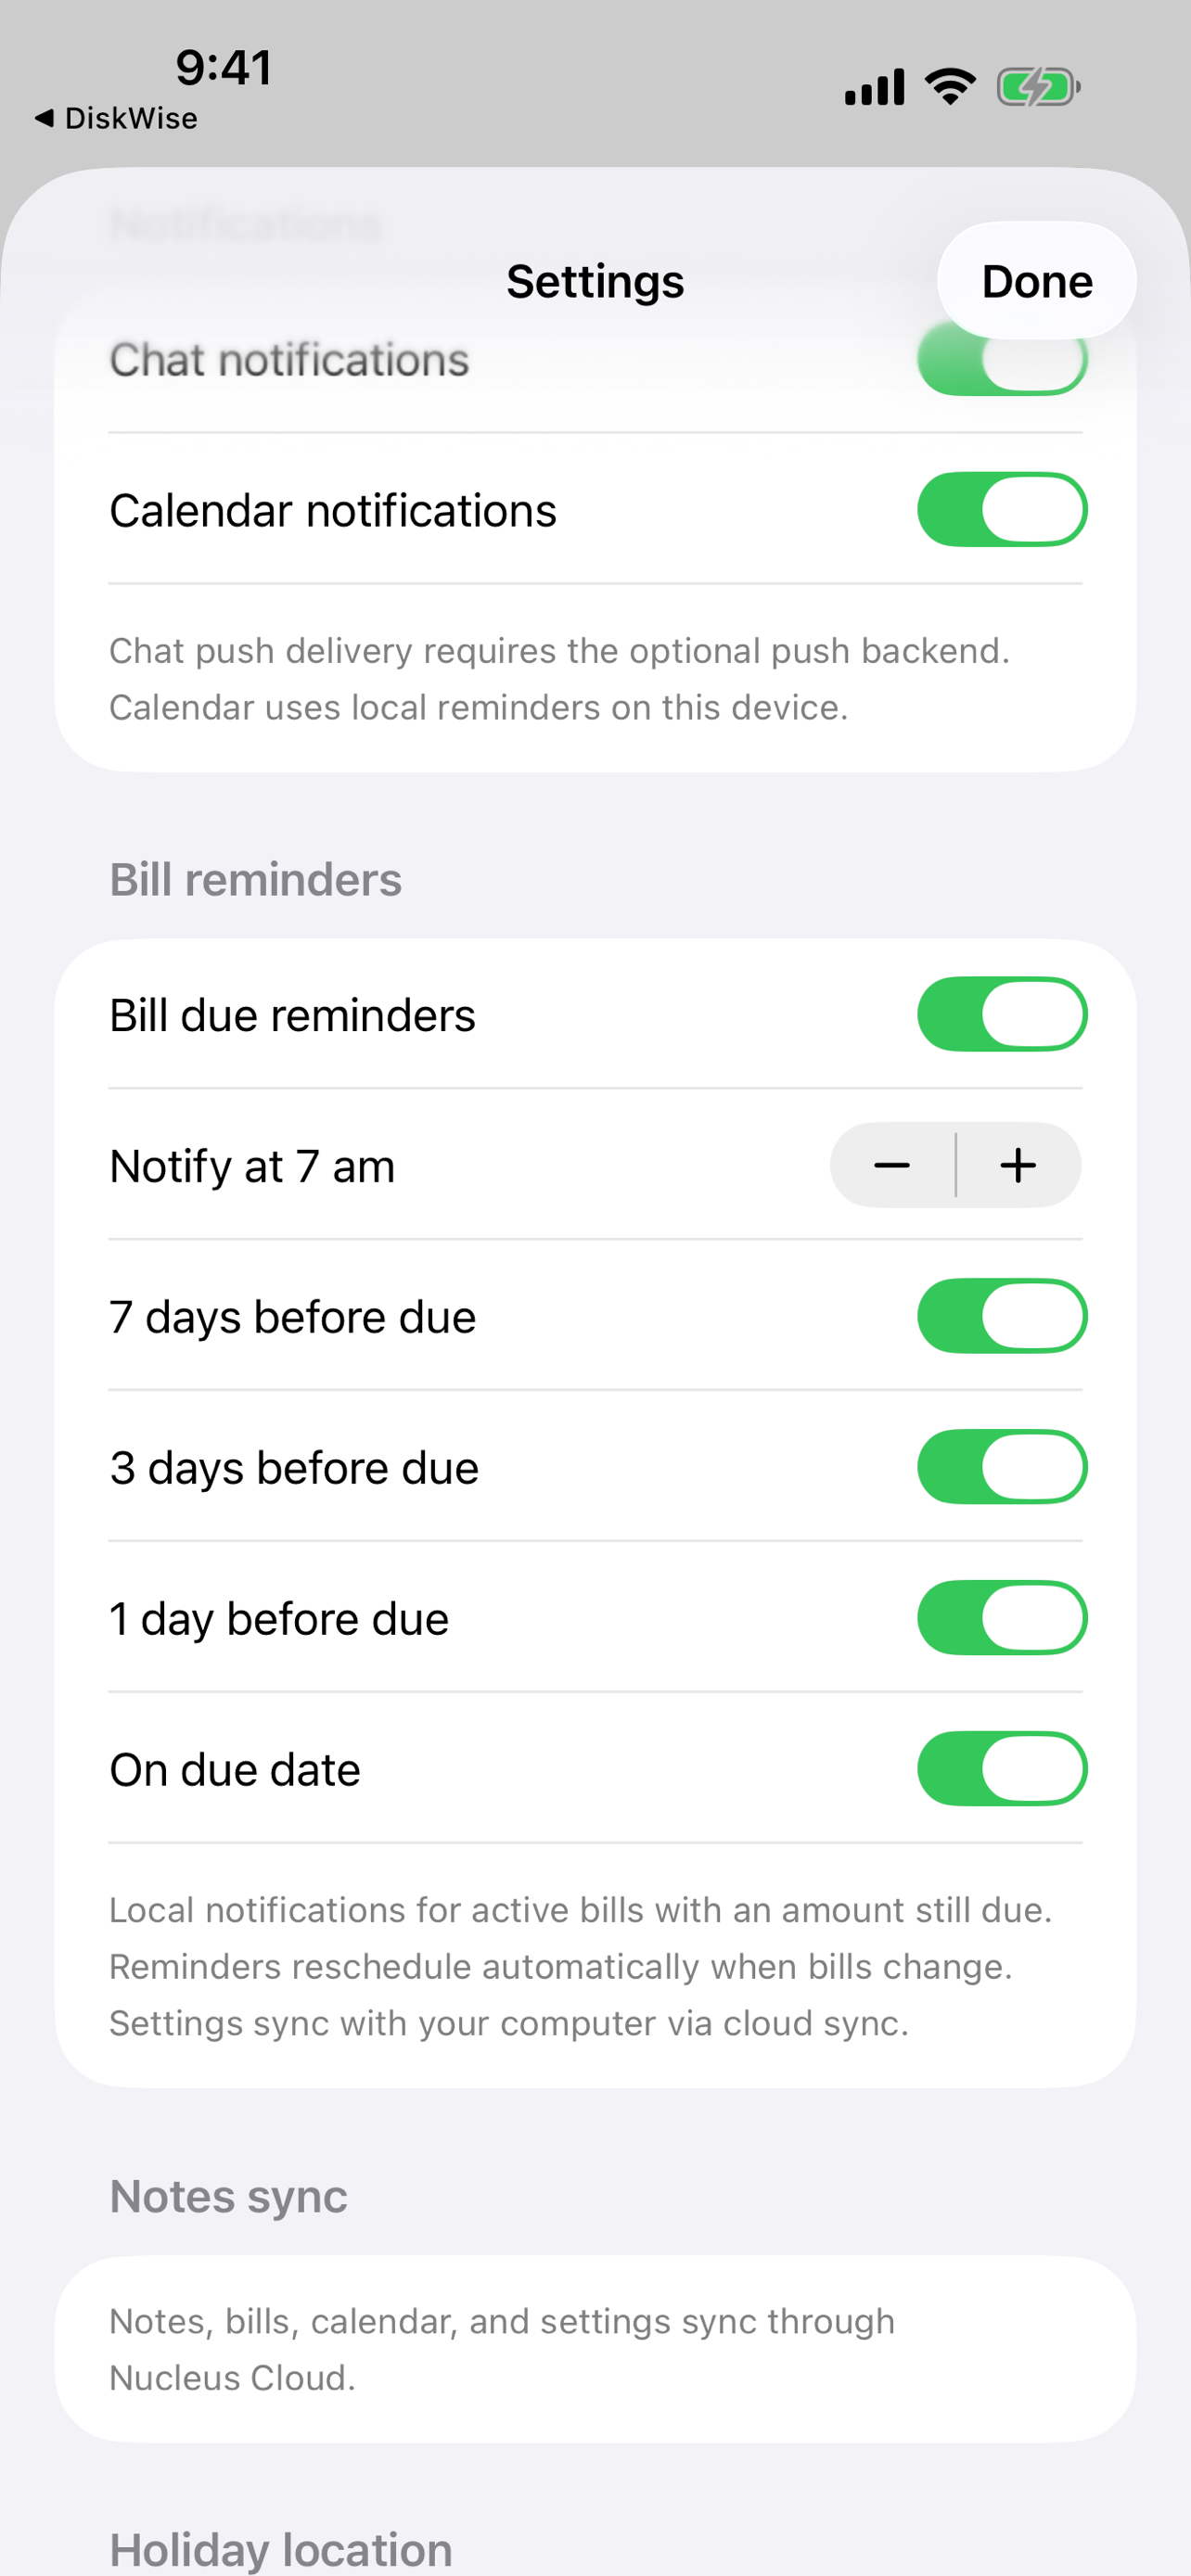
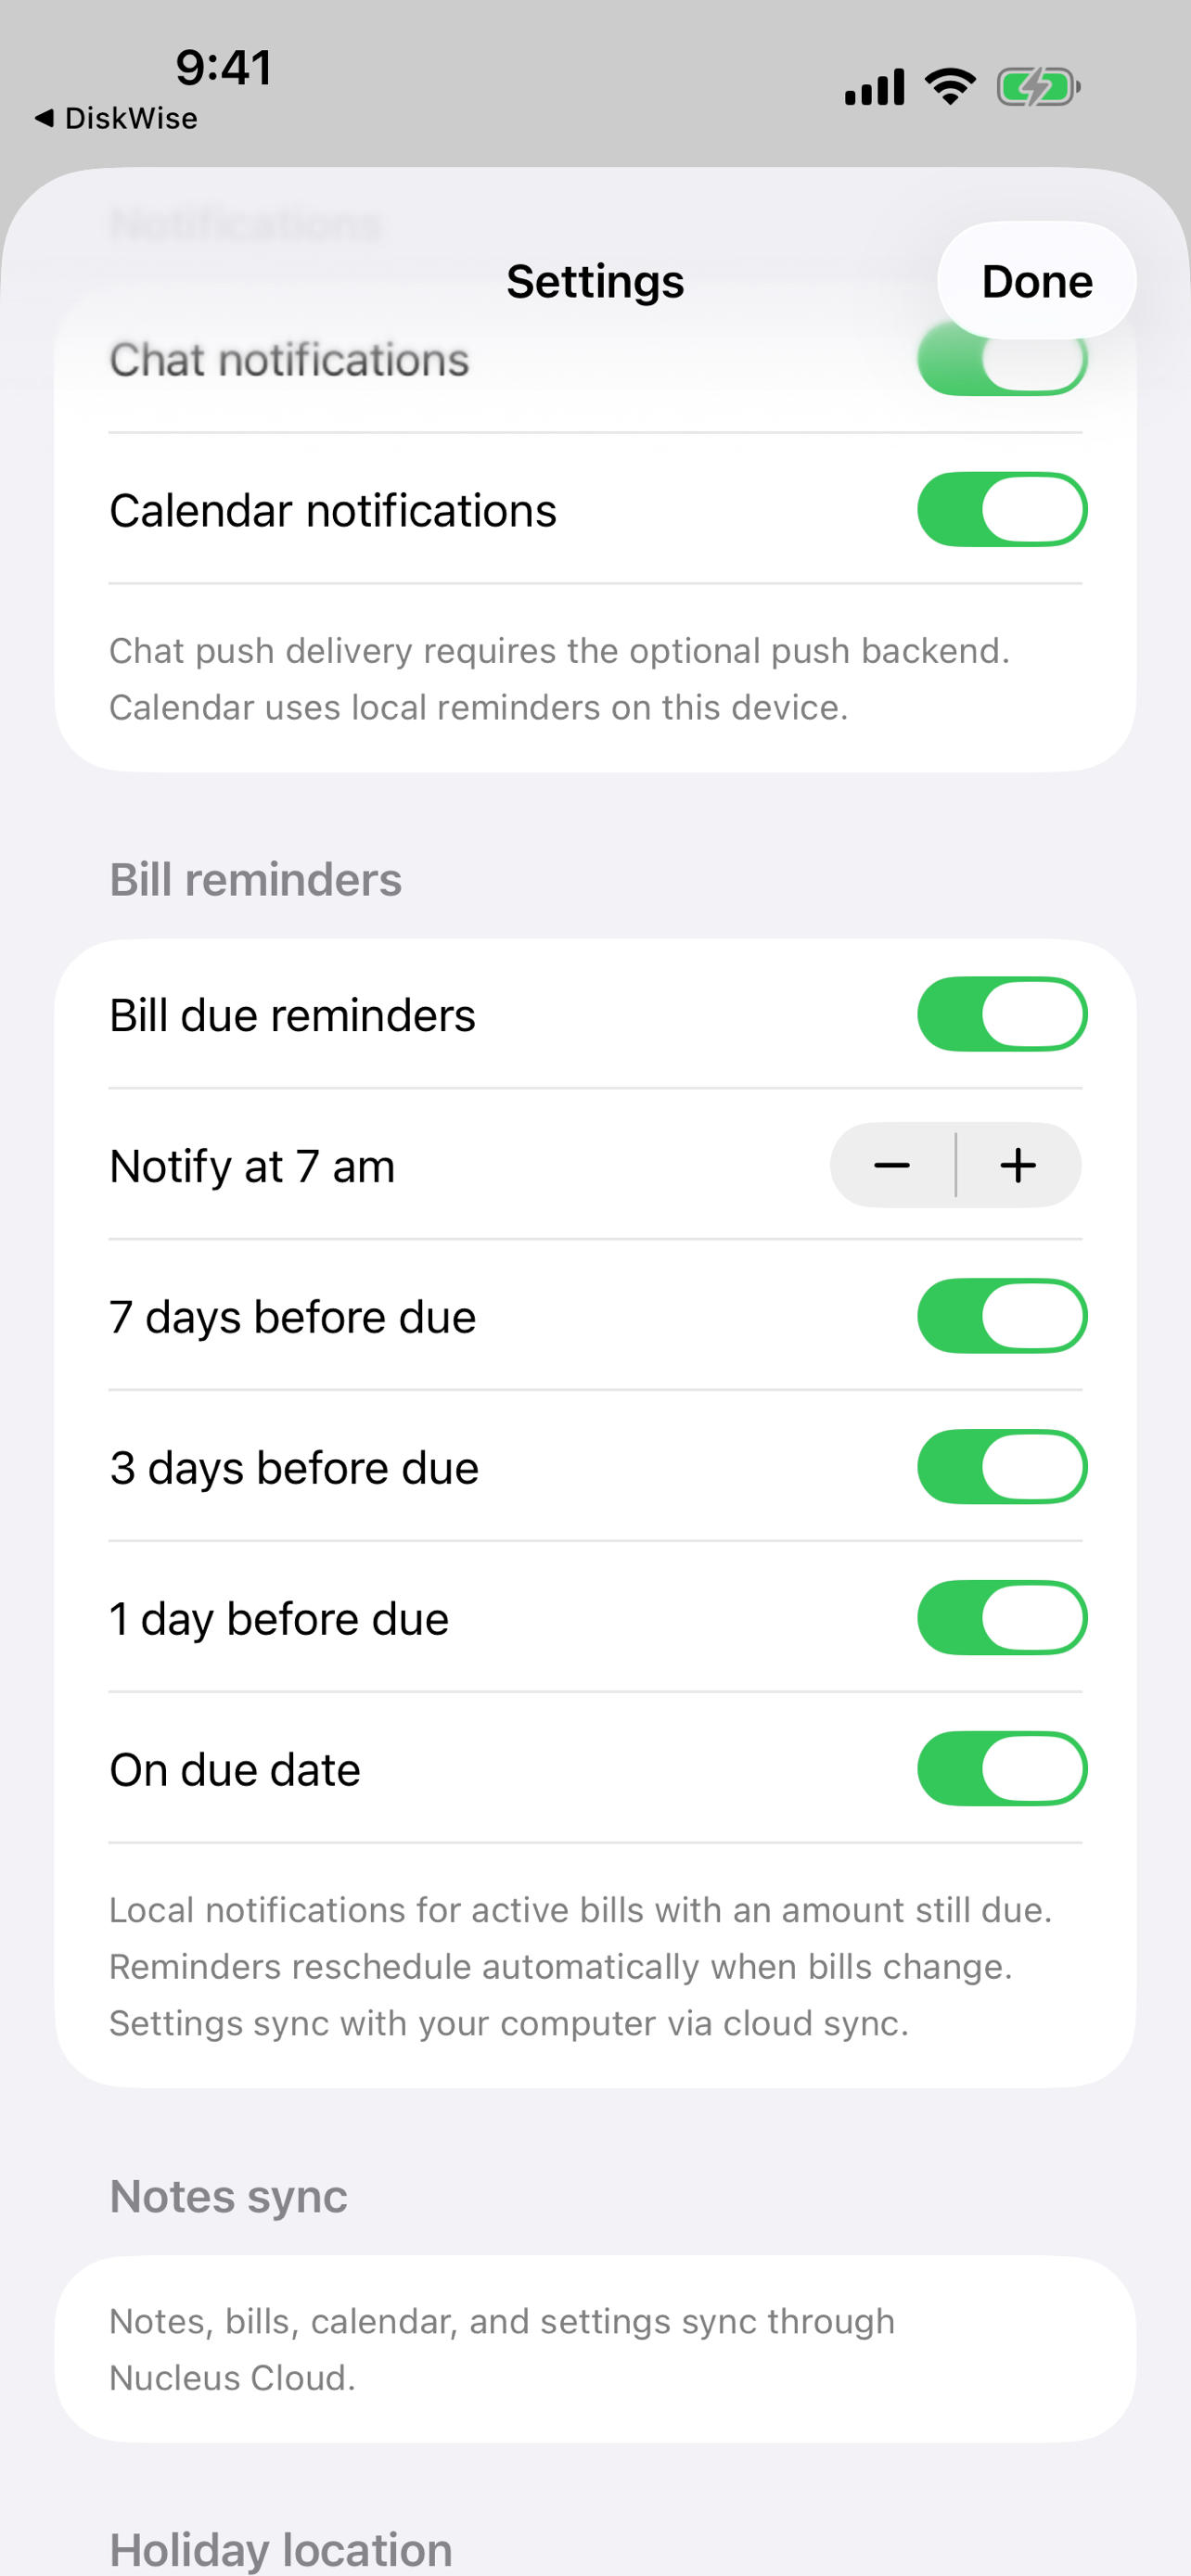
In Settings → Bill reminders, configure when to notify (7, 3, and 1 day before due, plus on the due date). Reminders reschedule automatically when bills change.
- Only active bills with an amount still due generate reminders.
Step 3
Meeting reminders and Live Activities
When calendar notifications are enabled, Nucleus schedules local reminders before meetings. On supported iPhones, the next meeting today can appear as a Lock Screen Live Activity with a countdown.
- Live Activities dismiss automatically when the meeting starts.
- Meeting links from synced calendar events include a Join button in reminders.
Step 4
Calendar notifications from Mac settings
Calendar notification preferences set on macOS sync to mobile. Toggle Calendar notifications in mobile Settings to enable or disable local meeting reminders on that device.
Step 5
App icon badge
The Nucleus app icon shows a badge count for bills due or overdue within the attention window.
Managing bills
Track recurring bills on macOS, log payments on the go, and get due-date reminders on mobile.
Step 1
Create bills on macOS
Open Bills on your Mac. Add name, amount, recurrence, due date, and category. Bills sync to Nucleus Cloud when you save.
Step 2
View bills on mobile
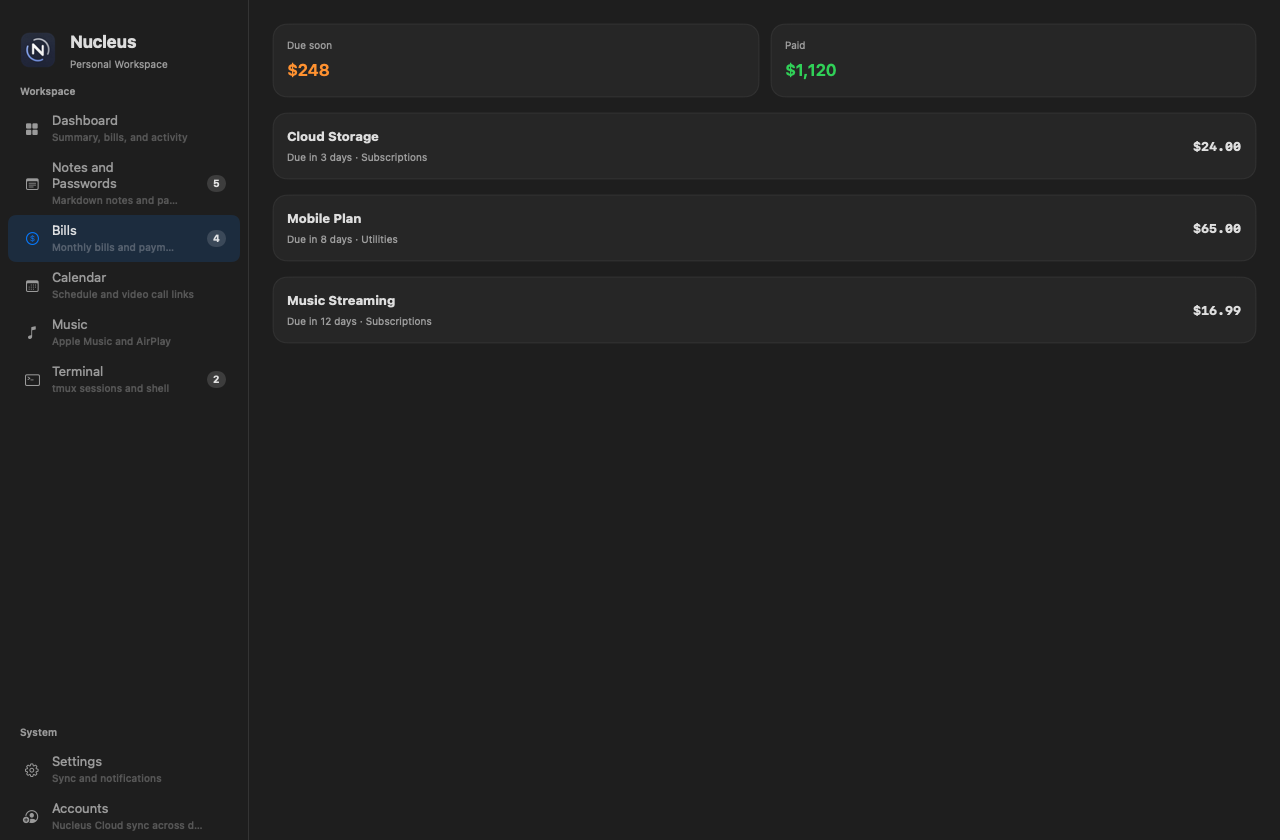
Open the Bills tab on iPhone, iPad, or Android. Active bills sort by due date.
Step 3
Log a payment
Tap a bill, enter the payment amount and date, and save. Partial payments are supported — Nucleus calculates the remaining balance and next due date.
Step 4
Monthly summary on Dashboard
The mobile Dashboard shows a bill payment summary alongside notes count and upcoming meetings.
Step 5
Archive and edit on Mac
Archive or edit bill details on macOS. Changes sync to mobile on the next pull or cloud sync.
Notes and passwords
Markdown notes and a password vault sync between Mac and mobile. Protect sensitive entries with device biometrics.
Step 1
Notes on macOS
Create markdown notes in the Notes folder. Use folders to separate general notes from password entries.
Step 2
Read and edit on mobile
Notes and Passwords are separate tabs on mobile. Tap a note to edit; changes save locally and sync to Nucleus Cloud.
Step 3
Capture from clipboard
On mobile Notes, tap the clipboard button to create a note from copied text — useful for quick captures on the go.
Step 4
Password vault security
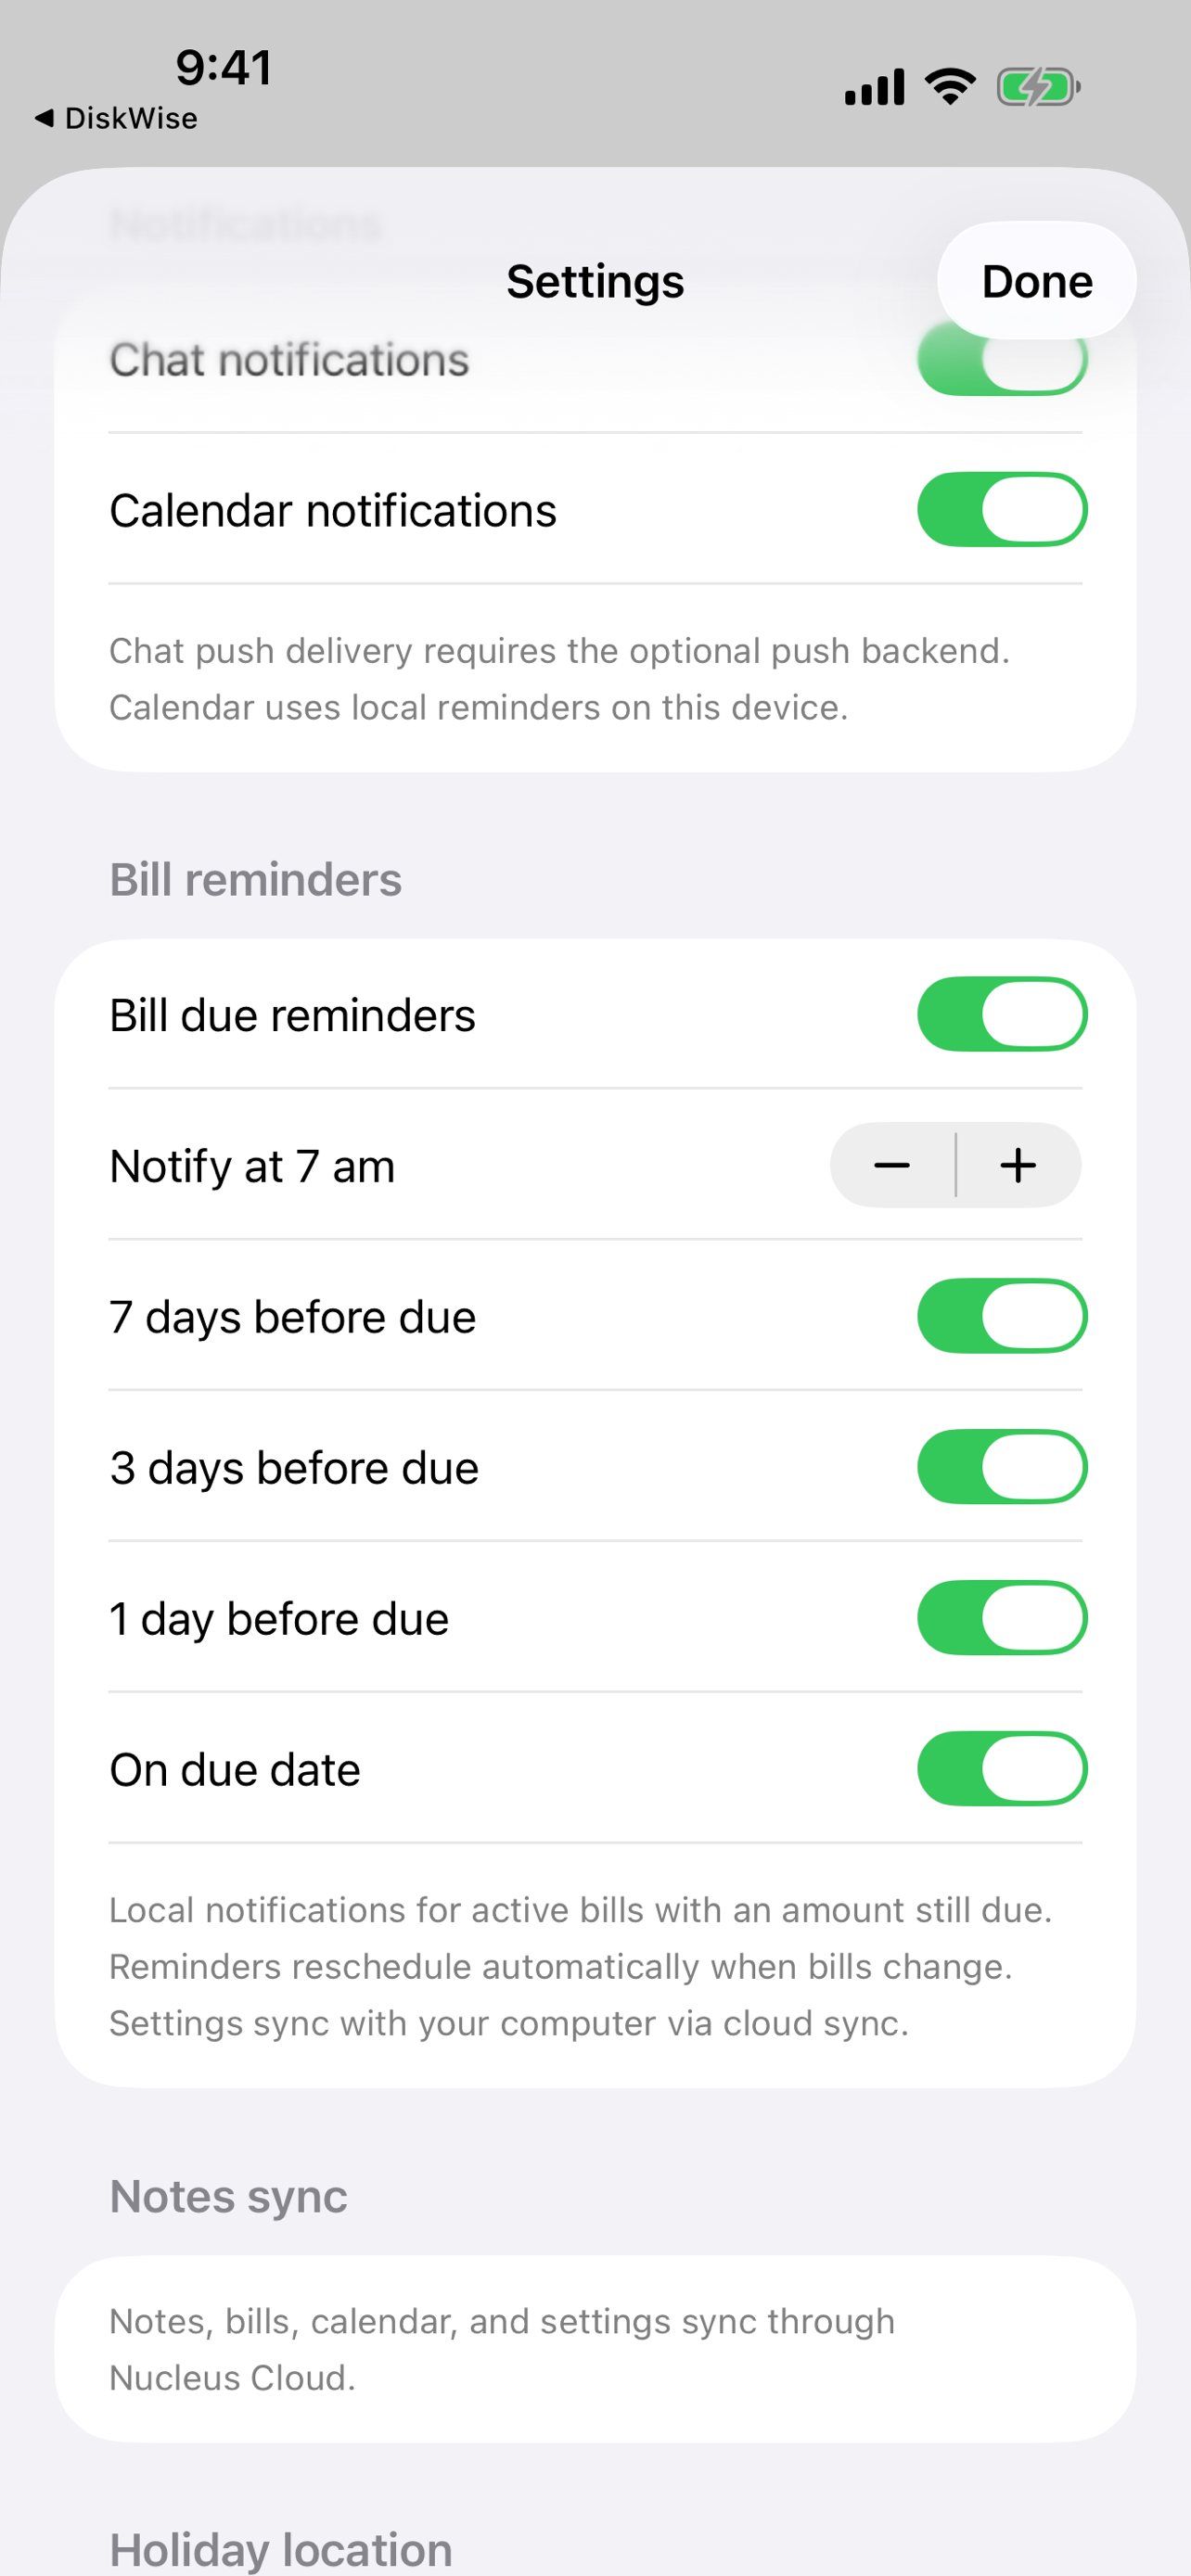
Enable Face ID, Touch ID, or passcode in Settings → Security. Nucleus locks when you switch apps to keep password entries private.
Step 5
Pull to refresh
If a note created on Mac is missing on mobile, pull down on the list or open Settings and sync from Nucleus Cloud.
Troubleshooting sync
Common fixes when data does not appear on mobile or cloud sync shows disconnected.
Step 1
Confirm the same Nucleus Cloud account
Account Center on Mac and Settings on mobile should show the same email. Sign out and reconnect if you used different Google accounts.
Step 2
Sync manually on both devices
Mac: Account Center → Sync Now. Mobile: Settings → Sync from Nucleus Cloud. Wait a few seconds, then pull to refresh.
Step 3
Check Mac is backing up
On macOS, create a test note and wait a few seconds. If Nucleus Cloud status is Connected, the note should appear in your cloud account at nucleus-sync.suherman.net.
Step 4
Restart the mobile app
Force-quit Nucleus on your phone and reopen. Bootstrap runs a cloud pull if you are already signed in.
Step 5
Still stuck?
Open an issue on GitHub with your macOS and mobile versions, whether Nucleus Cloud shows connected on both devices, and which data type is missing (notes, bills, or settings).
Companion app version
iPhone, iPad, Apple Watch companion v1.0.4. Android companion v1.0.0. macOS builds are available from the Download page with automatic updates via Sparkle.